Eco printing uses real leaves to stamp colour and pattern onto fabric. Here’s everything you need to make your first beautiful eco-printed piece.
Hi Creative Mamas! Welcome to this Beginner’s Guide to Eco Printing on Fabric. As you probably know by now I absolutely love playing around with natural dyes and natural pigments to create botanical prints and beautiful natural colors.
Eco printing techniques allow us to take the knowledge we have on natural dyeing and apply it in a very creative and experimental way.

You can combine eco prints from leaves and flowers with iron blankets, color blankets, solar power dyeing, natural dyeing... the sky is the limit!
In this post I want to introduce you to the world of eco printing on fabric and I want to share with you what is actually possible through experimenting and getting creative with this method of eco dyeing.
Have a look at these beautiful DIY bags that are made with eco printed silk from The Eco Printing on Fabric Video Course.

Download your FREE List of the best 30 plants to eco print
Eco printing on fabric
Botanical prints on fabric are created in a similar way as the botanical prints on paper. However, when eco printing on fabric there are a few things that are important to note:
- The prints must not wash away
- The prints need to be colorfast and not fade away when exposed to the sun
- The fabric needs to last, this means being careful with the use of iron solution (ferrous sulfate) and any other substance that may deteriorate the fiber and damage it.
Check out the best tips to make great eco prints here.

What fabrics can you eco print on?
As with natural dyeing, you must always use natural fibers such as:
- 100% cotton
- 100% linen
- 100% silk
- 100% wool
- 100% leather
- any mixed fiber blend (30%silk, 70%cotton)
In order to confirm if your fibers are 100% natural you can perform a burn test. It’s super quick and easy!
Silk, wool and leather are protein fibers and need to be mordanted and scoured in a different way than cotton and linen which are cellulose fibers.
Do you need to mordant fabric for eco printing?
You need to work with mordanted fabric as in any other form of natural dyeing. As with all natural processes there are some rules to follow such as mordanting the fabrics and using the appropriate dye plants.
For protein fibers I only use Alum Sulfate as a mordant. It’s very eco friendly and gives the best results as far as I am concerned.
For cellulose fibers I only use Alum Acetate in combination with Soda Ash. This is a longer process than with protein fibers but it will give you the best results.
You can read all about how I use mordants in my natural practice here.
Which leaves and flowers work best for eco printing?
Choosing the best leaves and flowers for eco printing is the most important!
If you are printing with flowers that have no dye in them it will be a waste of time. The same goes for leaves.
Some leaves have beautiful dye qualities and they are high in tannins which make them perfect for eco printing. Others will not provide any prints at all.
Get the FREE Eco printing plant list
Leaves and flowers
For a detailed post about the best dye plants to use in eco printing check out this article. I tend to use different plants for different projects and techniques.
I grow my own botanical dyes such as coreopsis, dyer’s chamomiles and marigold flowers. These flowers deliver the most bright yellow prints ever! I just love printing with them.

For leaves I tend to go for eucalyptus leaves, oak leaves, red maple leaves and liquidambars. I like using these plants because they have high tannin content.
They are also readily available to me in my environment but check out the FREE list of 30 plants you can choose from.
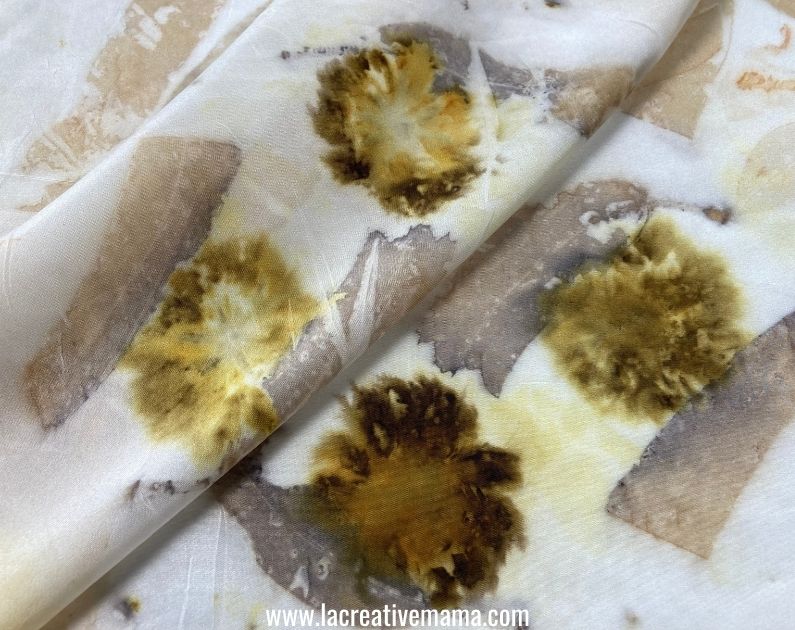
Eco printing on silk fabric
I get the best eco prints when I am using silk. This fiber takes the natural dyes beautifully and if you scour and mordant the fabric correctly you will achieve vibrant colors and beautiful textiles.
The photo below shows an example of a thin silk habotai printed using coreopsis flowers and eucalyptus leaves from New Zealand (there are many different varieties of eucalyptus and they all yield different tones and colors)
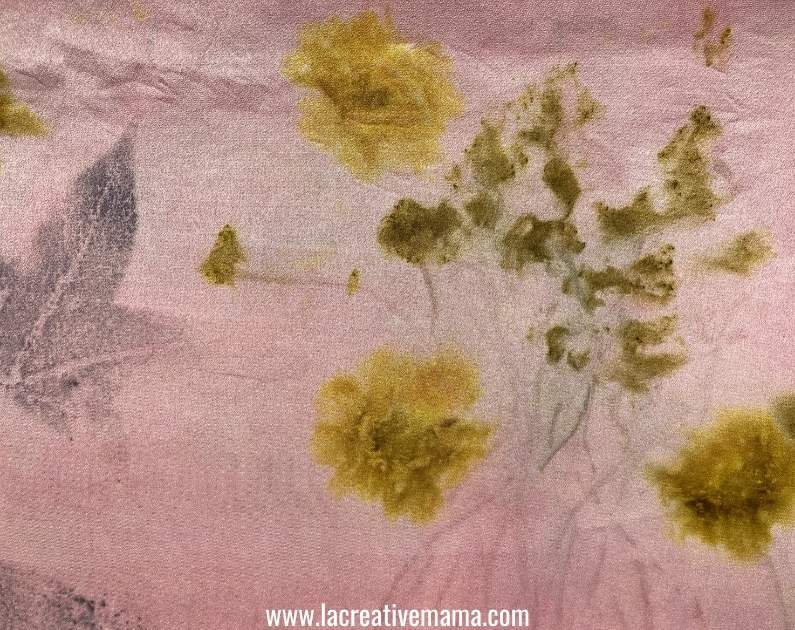
Eco printing on cotton fabric
The photo below shows a print made on cotton fabric using liquidambar leaves and dyer’s chamomile flowers. I used an iron dip for this print so there is a bit of black and the flowers turned from yellow to green.
However, you can easily appreciate how the prints are a bit more muted and less bright than the one obtained in silk.

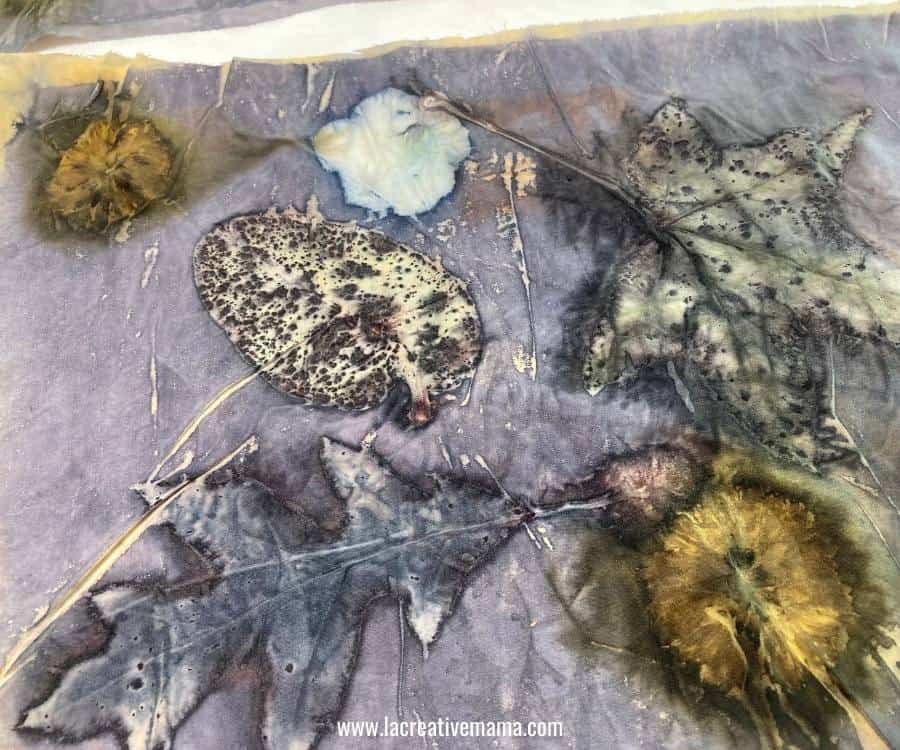
Eco printing on wool fabric
I also love using wool fabric to print with. I like to upcycle old woolen blankets which I usually get from thrift stores.
The photo below illustrates an old woolen blanket that was printed in one of my live eco printing workshops using avocado leaves alone.
As you can see the texture of the fabric provides an interesting canvas for the print.

Below is an experiment that I did by bundle dyeing wool fabric. I used rusty nails and objects as well as an avocado dye bath instead of the usual steam process.

How does an iron blanket work in eco printing?
Using an iron blanket is a great way to obtain different effects from the same plants. Basically a blanket is a carrier.
For a full walkthrough of every blanket type, see my guide on how to use eco printing blankets.
The idea is that you lay a piece of fabric. You then place your plant material on top of it. Finally you place another piece of fabric which is carrying the iron and you place it on top.
The blanket or carrier will transfer its color or modifier quality during the steaming process to the target piece.
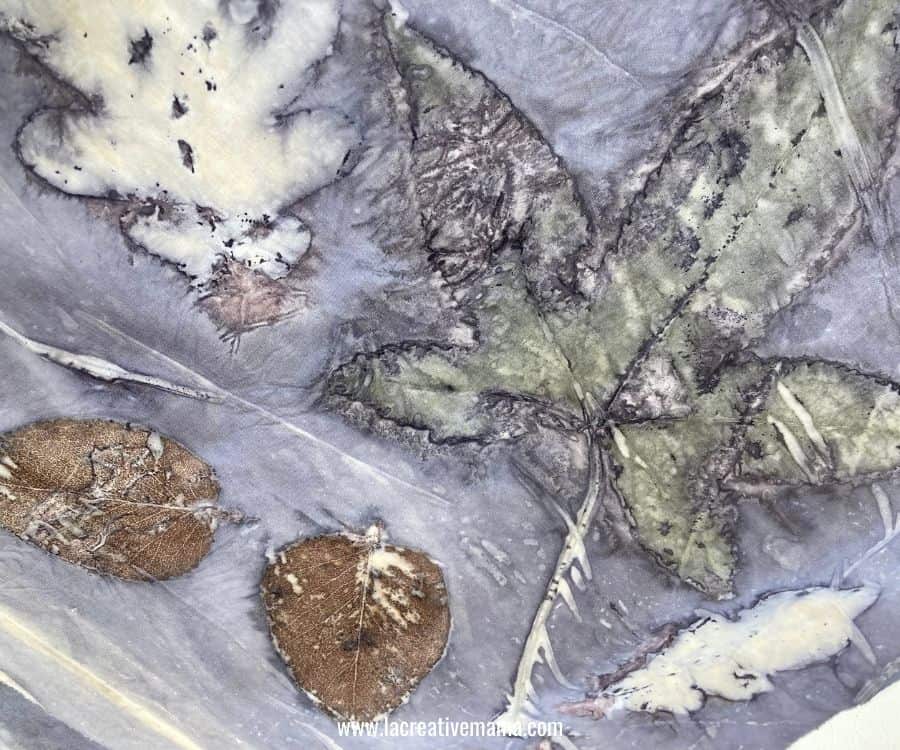
When working with iron, I actually prefer using it as a dip as in the photo above. The photo below shows cotton fabric which was exposed to an iron blanket.
If you want to master eco printing with iron blankets join me in my super popular step-by-step eco printing course here.
Eco printing with color blankets
Color blankets follow the same process as the iron blankets. The only difference is that rather than transferring the color modifying qualities of iron they transfer color.
I print with color blankets using natural dyes and the results are amazing!!!!
The photo below shows a print created using a cochineal color blanket.

The photo below illustrates the results that can be achieved by combining blankets and dips.

Natural dyes and eco print
Over the last couple of years I have developed my own signature way of eco printing by combining it with what I love most: Natural Dyeing.
I created a process of mixed media that allows me to combine traditional natural dyeing methods with solar power dyeing and eco printing.
This is probably one of my favorite pieces but when you work with mixed media there is no limit to what you can achieve 🙂
How to Eco Print with Eucalyptus
Eucalyptus is one of the very best plants for eco printing. The leaves are rich in tannins and natural pigments, which means they print with beautiful clarity and the impressions last. Different varieties give different results: some print in warm golds and rusts, others in deeper greens and khakis, and the soil and climate where the tree grows makes
a difference too.
Silver Dollar Eucalyptus is my personal favorite for eco printing, the round leaves create stunning circular prints and the color payoff is consistently gorgeous.
If you want to go deeper into exactly what Silver Dollar Eucalyptus produces and how to work with it, I’ve written a full guide in my Plants That Dye series, read the Silver Dollar Eucalyptus post here.
You can also use eucalyptus as a natural dye bath (not just for printing), it gives beautiful warm golds and mustard yellows on wool and silk.
Fresh leaves or dry leaves?
I use both, dry and fresh leaves and flowers. I know that some printers recommend only using fresh but in my experience I always get good results with both.
If you like to collect leaves for later use, I recommend that you keep them inside book so that they dry flat.
The other thing to consider is to hydrate your leaves and flowers just before using them for printing. I use clear water and that gives me the best results.
The most important thing in eco printing is choosing the right plants to work with so make sure you download your FREE plants list to get you started in eco printing straight away 🙂
FAQ
Eco printing is a natural technique where real leaves and flowers are pressed against fabric and steamed, transferring their shape, color, and tannins directly onto the cloth. Each print is one of a kind. It builds on natural dyeing, so the same fibers and mordants apply.
Yes — mordanting is what makes the prints permanent and stops them washing or fading away. Protein fibers like silk and wool and cellulose fibers like cotton and linen are prepared differently. Skipping this step is the most common reason beginner prints disappear.
An iron blanket is a separate piece of fabric soaked in iron that you lay on top of your leaves to transfer its modifying effect during steaming. An iron dip is when you submerge fabric in iron solution directly. The blanket gives softer, more controlled shifts; the dip gives stronger, darker results.
No — the blanket is a carrier, not your finished piece, so it doesn’t need mordanting. What does need mordanting is your target fabric, the one you want to keep. Always rinse the blanket so it isn’t dripping before you lay it over your bundle.
The best plants are high in tannins — eucalyptus, oak, maple, and liquidambar leaves print with beautiful clarity. For flowers, coreopsis, dyer’s chamomile, and marigold give bright, reliable color. Plants with no dye in them won’t print, so choosing the right material matters more than anything else.
Yes, but cotton is a cellulose fiber and needs a different mordanting process than silk or wool. Cotton prints tend to look a little more muted than silk, which takes color most vibrantly. With the right preparation you still get lovely, lasting prints.
Both work — despite the common advice to only use fresh, I get good results with either. If you collect leaves to dry, press them flat inside a book. Whichever you use, rehydrate them in clean water just before printing for the best impression.
Almost always because the fabric wasn’t mordanted, or wasn’t a natural fiber. Eco prints only last on scoured, mordanted natural fabric, and synthetic blends won’t hold the color. Get the fiber and mordant right and your prints will stay vivid and washfast.
Eco print fabrics from my students
I hope you are super excited to learn more about eco printing! Check out the work of my star students in our students page!
Bundle dyeing
Another way to create botanical prints is through bundle dyeing method. This is a way to eco print with color splashes and irregular forms rather than with outlined leaves and flowers.
Check out how to do bundle dyeing, you can use onion skins and iron water in combination with different flowers and leaves. It’s a very experimental way of dyeing silk scarves!
Pin this tutorial to your favorite Pinterest board

Please reach out with any questions that you may have!
Hi, I am Victoria!

Welcome to my creative world!
I created LA CREATIVE MAMA as a crafty home for all my crafty talented friends who want to get inspired and creative with DIY sewing projects, upcycled fabric crafts, natural dyeing, eco printing and of course my favorite: DIY Sustainable FASHION!
Get in touch!
Join me and the community of Creative Mamas! Come over to Facebook / Instagram/ Pinterest and leave a comment or reply to a blog post here.
Would love to see any pics from projects you did from my blog and I can feature you here!
Victoria’s eco printing has opened my eyes and life to so many possibilities. I am an older woman exploring different levels of creation and enjoying life. I found myself always limited to what was available on the market for prints, always attracted to batiks. But I saw Victorias ad for eco printing and yes… yes.. of course this is what I needed, to create beautiful prints of my own…. WOW… her methods of teaching are amazing, easy to follow, fun… and the prints that I got the first time done, my jaw dropped and how I have never explored such an amazing way to make beautiful fabrics before, wow and Victoria is such an amazing person, she communicates on such a warm welcoming manner… so much knowledge, exploring and making beautiful things from nature, you can’t go wrong…
Sharon, thank you so much for your kind words!!!!
Hello dear Victoria..I’m really happy to find your pin..and thank you for sharing your experiences.You and your creative work (art) are so lovely..But I would like to say that I’m little bit confused..For example I have some silk and leaves i,a piece of fabric and iron sulfat.First I will put leaves on silk and then I will put the fabric soaked in iron sulphate on the leaves and wrap it.Then I will boil in the cup is it correct
With my love
Hi there! The idea is that you sandwich the leaves in between 2 layers of fabric. Make sure that your target fabric is mordanted. The top piece of fabric could be an iron blanket like the one you describe…also I dont suggest you boil, simply steam for 1 hour. Hope this helps!
Hello. When using a dye blanket, do you use it wet and do you rinse it before using.
Thank you.
Denis.
Yes you use it wet but make sure that you rinse it enough so that its not dripping over your target piece before you have a chance to place it on top
Hey, I have a few questions. So, both blanket and the target fabric need to be mordanted?
Does iron blanket needs to be mordanted?
I have leftovers from dyeing of wool, there is some amount of dye left there, but I don’t know how much. Can I use that as a color blanket?
And also, I don’t understand what is a difference between a dip and a blanket.
Thanks very much for your help!