
Hi Creative Mamas! Today we are diving into the beloved tea dye and exploring different options on how to dye paper with tea.
Paper has an important role to play within the area of natural dyeing and you can create your own gift tags and gift wrapping as well a handmade books and journals by dyeing and printing paper with natural dyes.

This blog post will teach you an easy way to tea stain paper using tea. You will be able to create a vintage look and an aged look for your paper crafts.
I will show you a simple method that can be applied to different types of white paper:
- Watercolor paper
- Printing paper
- Eco printed paper
- Brown paper
- Scrapbooking paper
Tea dyeing paper tutorial
This post contains affiliate links, which means I receive a small commission, at no extra cost to you, if you make a purchase using this link. Please see my disclosure for more details.
Materials & equipment
- Black tea bags (to make the tea water or tea dye)
- Watercolor paper (I am using 150 grams and 300 grams)
- Sheets of paper (printing paper)
- Scrapbooking paper card stock
- Eco printed paper
- Laundry pegs
- Shallow dish or shallow pan (a large pot can work well too)
- Paper towels
- Hot water
Tea dyeing liquid
Let’s go through the basic technique and then I will show you how to apply tea dye to the different types of paper.
First of all gather all your materials. I really love using different weights of watercolor paper as well as other types of papers in the same tea dyeing session to get the most out of my time!

I also like to experiment with using a half a sheet of paper or the entire piece of paper.
Just make sure that whatever shallow dish you are using is a bit bigger than the size of your papers.
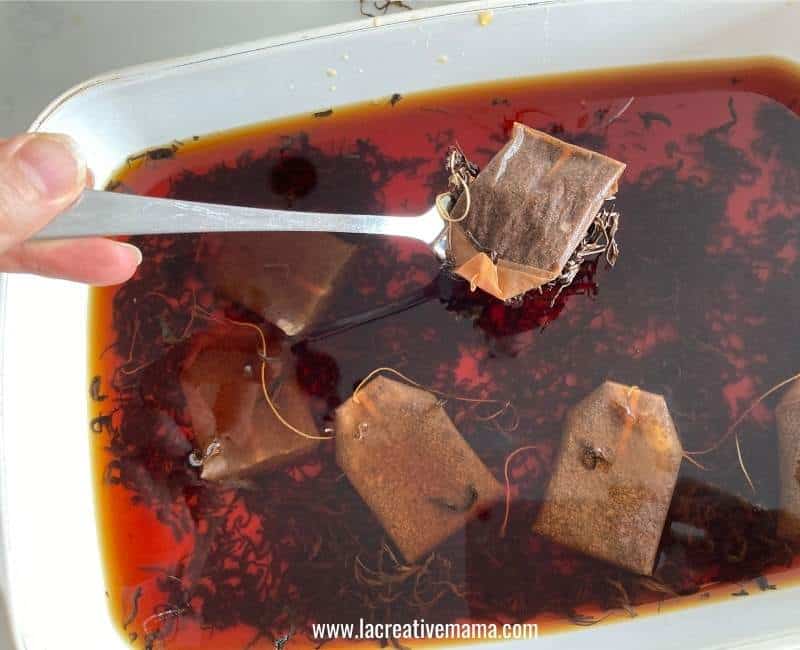
Fill your dish with hot water and your bags of black tea.

I also like to add loose tea strands in the tea staining liquid as well.
Note: you really need black tea bags to get the results shown in this tutorial. If you use green tea or any kind of herb tea you will obtain very different results.
Also instant coffee (to make the coffee dye) could be a good replacement for black tea.
Leave the tea sitting in the hot water for at least 30 minutes.
You can also prepare this tea dye and leave it sitting overnight. This is my preferred option because you are guaranteed a richer deeper color.
Once your tea staining liquid is done you are ready to proceed!
How to dye watercolor paper with tea
Watercolor paper is my preferred option. It’s absorbent and it’s thick enough to stay in warm water for a while without disintegrating 🙂
The photo below shows the process using a piece of 150 grams watercolor piece of paper.
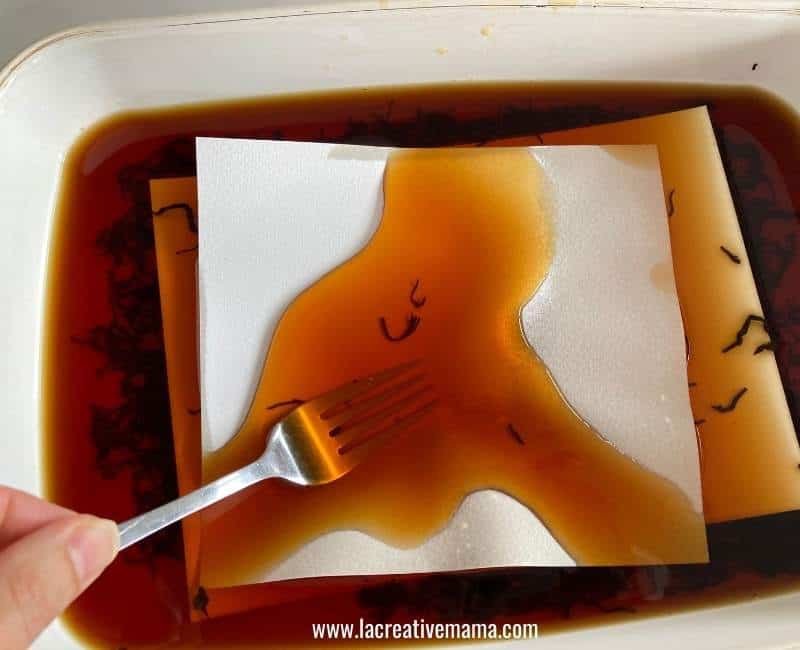
Immerse the paper in the tea dye. Press with a fork or spoon to make sure that it’s fully submerged.
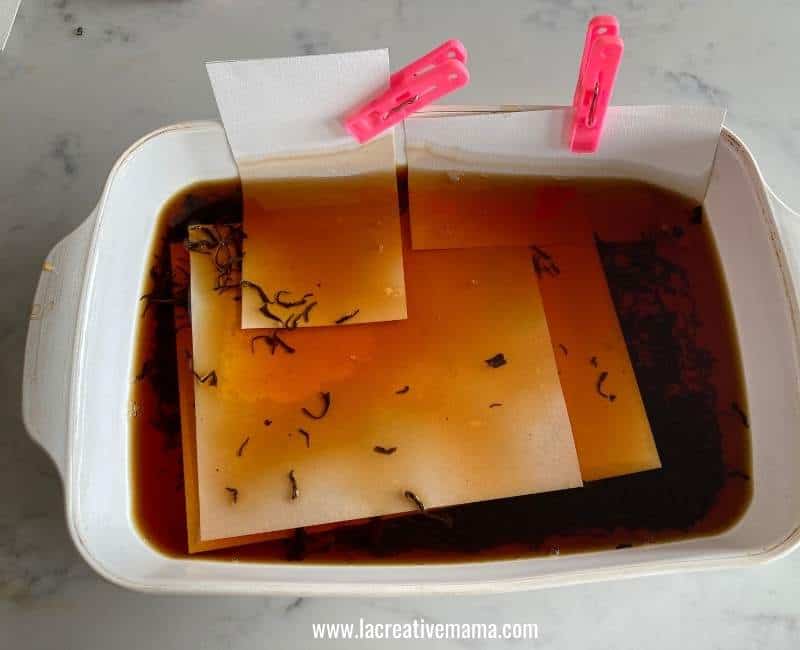
I have smaller pieces of paper that will be made into gift tags and I want to tea dye one section of the paper tag.
In order to do this, simply immerse half of the paper into the liquid. If you are using a shallow dish like I am using you can secure the paper by clipping it with a laundry peg.
In this way the paper will not move or shift positions :).
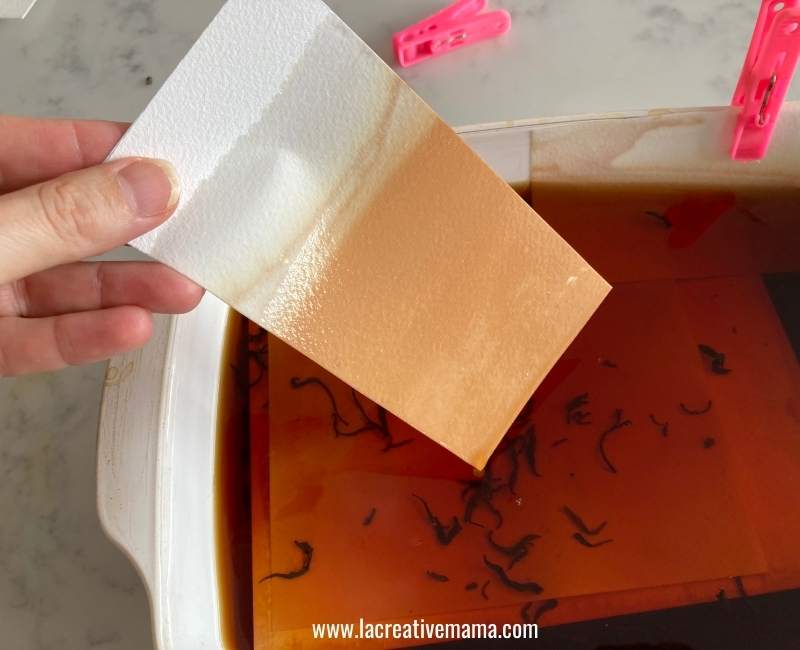
This first watercolor sample is not too thick so I only left it for 20 minutes. This is how it looks after that amount of time.

This is the solid color sample which has the different color intensities due to paper bunching together in the dye bath.
I like this effect too!

This is how the 150 grams watercolor tea stained papers look after 20 minutes of immersion.
It’s a great idea to lay the wet paper on a flat surface so it dries nicely.

I now want to show you how a 300 grams watercolor paper looks like after 30 minutes of tea dye immersion.
Using the same method as before, immerse the paper into the dye.

This paper is thicker and therefore will take you a little while to make sure that its fully wet and it stays submerged.

Press firmly with a fork or spoon. I like to put a small layer of black tea strands in between the papers.

After 30 minutes your paper will look like this. As you can see, a part of the paper looks more stained than others. I like this effect as well!

It’s easy to create an aged look and a vintage look using this heavier watercolor paper.

How to tea stain eco printed paper
Another great way to add more texture and more interest to your tea dyed paper would be to start by using paper which has already been eco printed.

To ensure that you get beautiful botanical prints make sure you are using the right leaves and flowers.
You can download the list of 30 leaves and flowers for eco printing by completing the form below!
Place your eco printed paper in the tea dye.

Keep an eye on how the dye changes the paper.
The colors from the print will be affected by the black tea so this is a more intuitive decision on your part as to when to remove the paper from the dye.
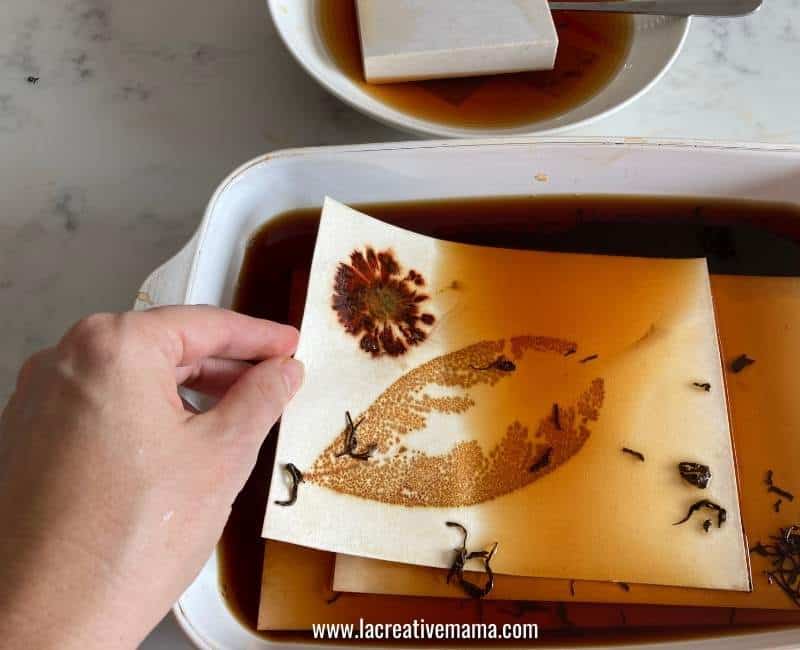
Never leave more than 1 hour even for thick paper!

The photo below illustrates the results after dyeing my eco printed paper for 30 minutes.

How to dye brown paper with tea
Repeat the same process as before but this time using brown paper.

For this tutorial I used drawing brown paper which in hindsight it wasn’t the best option.
I think it’s better to use a thicker brown paper so that you can leave in the dye bath for at least 30 or 40 minutes to get a better result.

How to tea dye gift tags
I love tea dyeing gift tags to use in combination with my handmade gifts.
I usually make my own gift wrapping bags and tags and tea dyeing has been an easy way to achieve quick instant great effects.
Immerse the tags in the dye bath following the same process but only leave for 10 minutes.
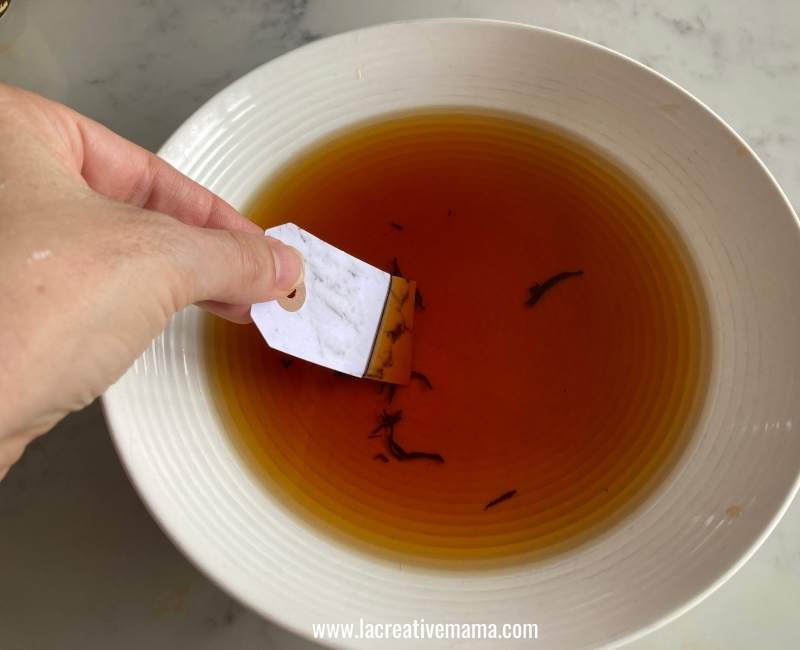
The photo below shows 3 different qualities of paper tags.
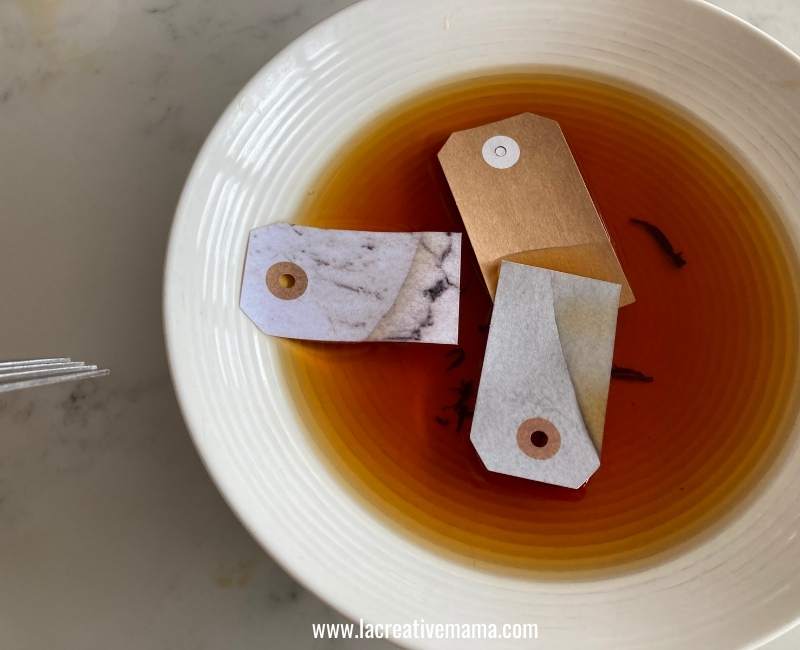
I love the effect on this marble one!

This is how the tags and the brown paper looked like after the tea dyeing process.

How to tea dye scrapbooking paper
My daughter loves scrapbooking and I am forever using her leftover paper cards and printed papers.
Of course I can’t help myself and I am forever printing or dyeing them.

In this case I am dying a white and black 80 grams paper.

I left it for only 15 minutes.

After that time I took it out because it was the perfect vintage look to go with my aged papers (eco printed cards).

Black tea is a fantastic substantive natural dye and it’s also the easiest dye to use because you don’t need to mordant the natural fibers (in this case paper which is a cellulose fiber).
Black tea is high in tannin which means that the actual tea dye will be the color and the mordant at the same time.It’s a great fabric dye.
I always teach my students to prepare their papers with Alum Acetate so that the paper is receptive to the natural dyes from leaves and flowers. You can check how to create beautiful botanical prints on paper here and also get all the paper printing tips here!
If you enjoy creating a vintage look on paper how about trying it on fabric! Discover how to create a vintage look on fabric here.
How to dye paper with coffee
Dyeing paper with coffee is another great way to stain your paper cards and gift tags!
To make the coffee dye dissolve instant coffee in hot boiling water. Let it cool until the water is warm.
Immerse the paper following the same method as with tea.
Save this tutorial to your favorite Pinterest Board
