Hi Creative Mamas! Making pleats is one of the easiest fabric manipulations and a great way to add volume to any garment.
Today I am showing you how to sew pleats the easy way: Using patterns!
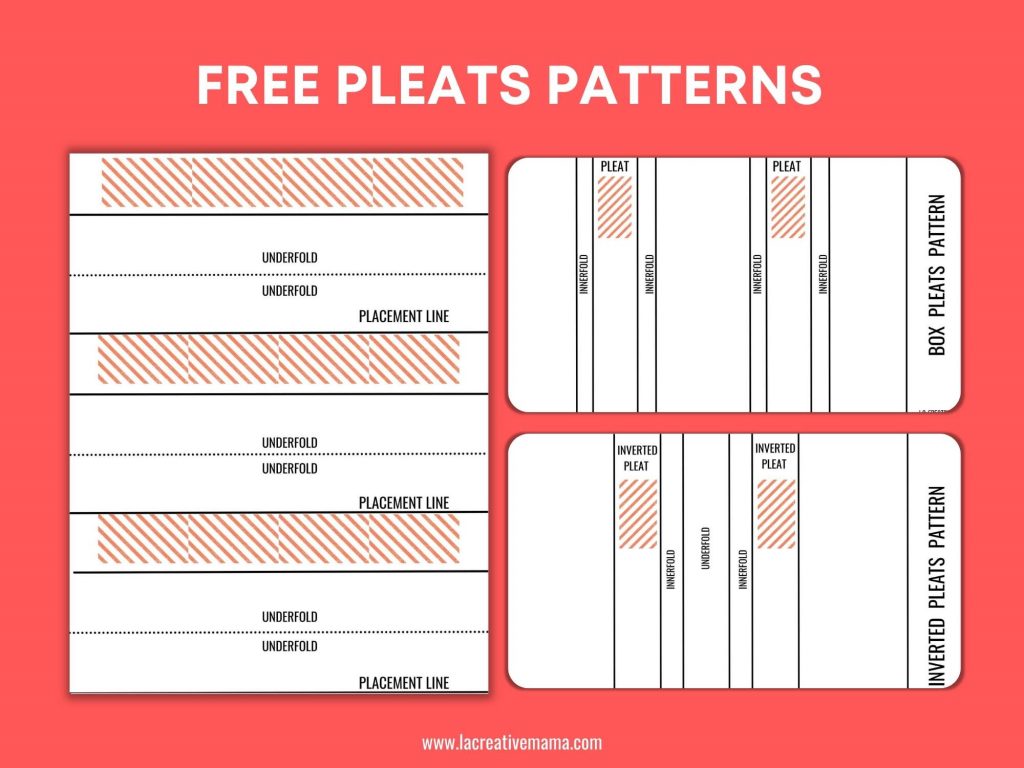
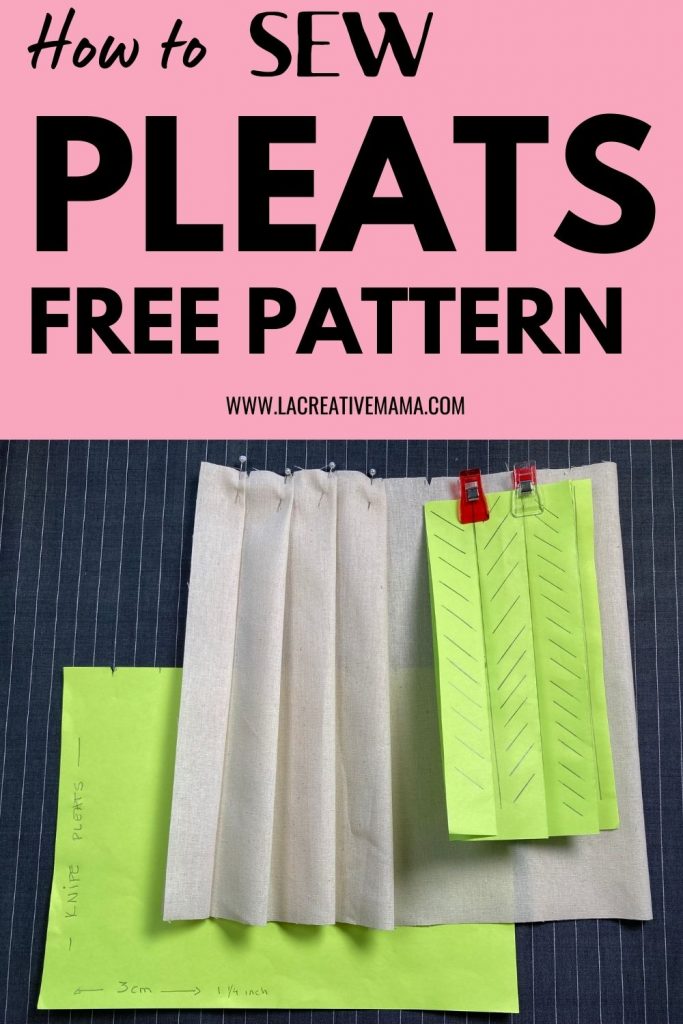
Making pleats is super easy, but when you want to create a pleated skirt or a consistent pleat effect you need to have a sewing pattern. I created a pattern for the 3 most common pleats:
- Knife pleats
- Inverted pleats
- Box pleats
If you have ever tried sewing pleats that are even and tidy and didn’t succeed, then these patterns will be the solution!
Pleats Video tutorial
I will show you how to make the basic pleats using patterns. I will show you the step by step process so that you can apply these patterns to any pleat measurement that you want to use.
Download your FREE Pleats Patterns
Feel free to change the measurements in the patterns but make sure that you understand the sequence of the sections in the patterns.
This post contains affiliate links, which means I receive a small commission, at no extra cost to you, if you make a purchase using this link. Please see my disclosure for more details
Knife pleats tutorial
The knife pleat is the easiest type of pleat and the most basic pleat as well.
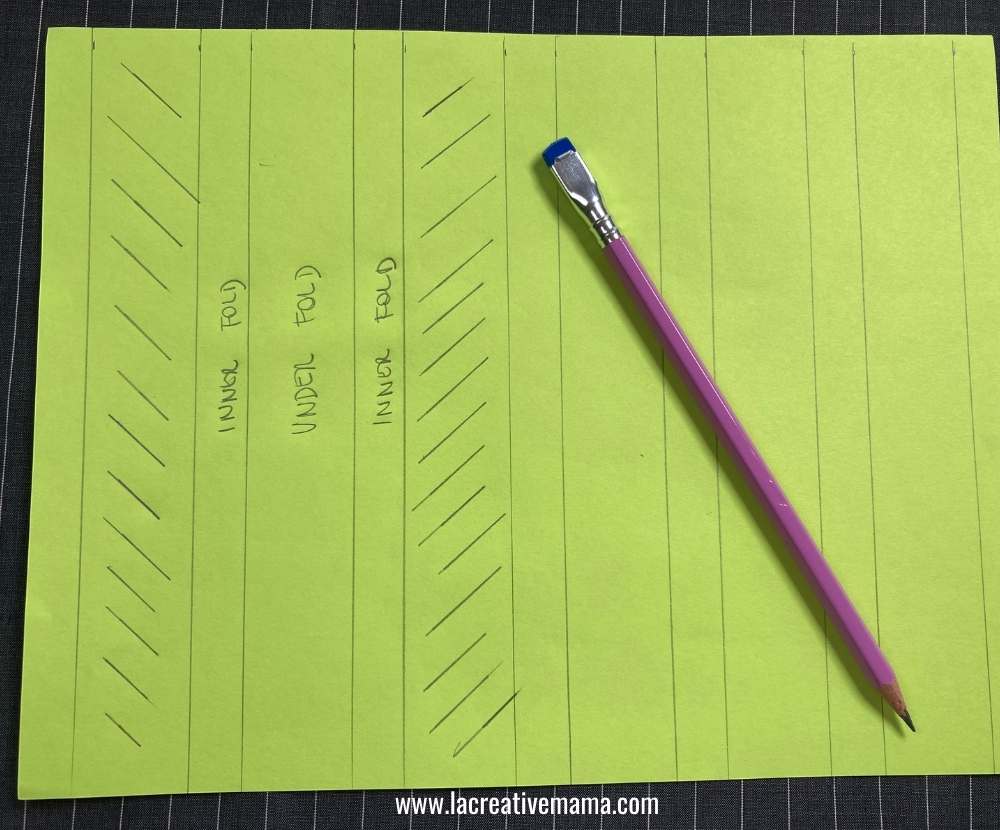
There is a top section which we call “pleat depth” or pleat width and 2 concealed sections folded under the top pleat section. These are called “underfold” sections (there are 2 of these per each knife pleat)
The first step is to grab a piece of paper and draw straight lines 3 cm or 1 1/4 inches apart. Don’t worry about the seam allowance at this stage.

I like to try my pleat patterns on paper first because it saves me any frustration of getting the measurement wrong on fabric.
Draw some diagonal lines on the first section. This will identify the pleat depth section of the first pleat.
Draw diagonal lines every 3 sections. These will be the top of the pleats throughout and will mark your placement line.

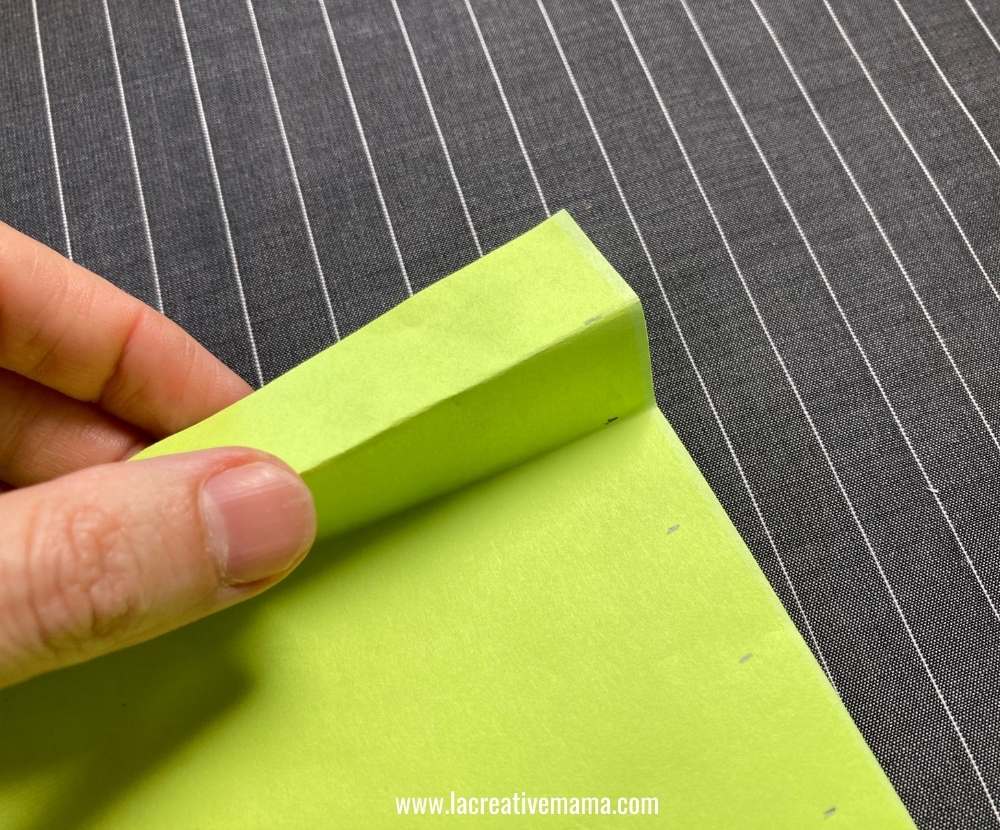
Fold the paper so that the diagonal lines sections are next to each other.

At this stage you need to identify each section in your paper pattern so that when you go to the fabric you have a clear understanding of where the folds of the pleats are.
In this case the top of the pleat is the diagonal lined section (pleat depth).
The underfold of the pleat is the section of the paper that folds back 3 cm or 1 1/4 inch and then folds forward again to meet the placement lines. These are called the fold lines.
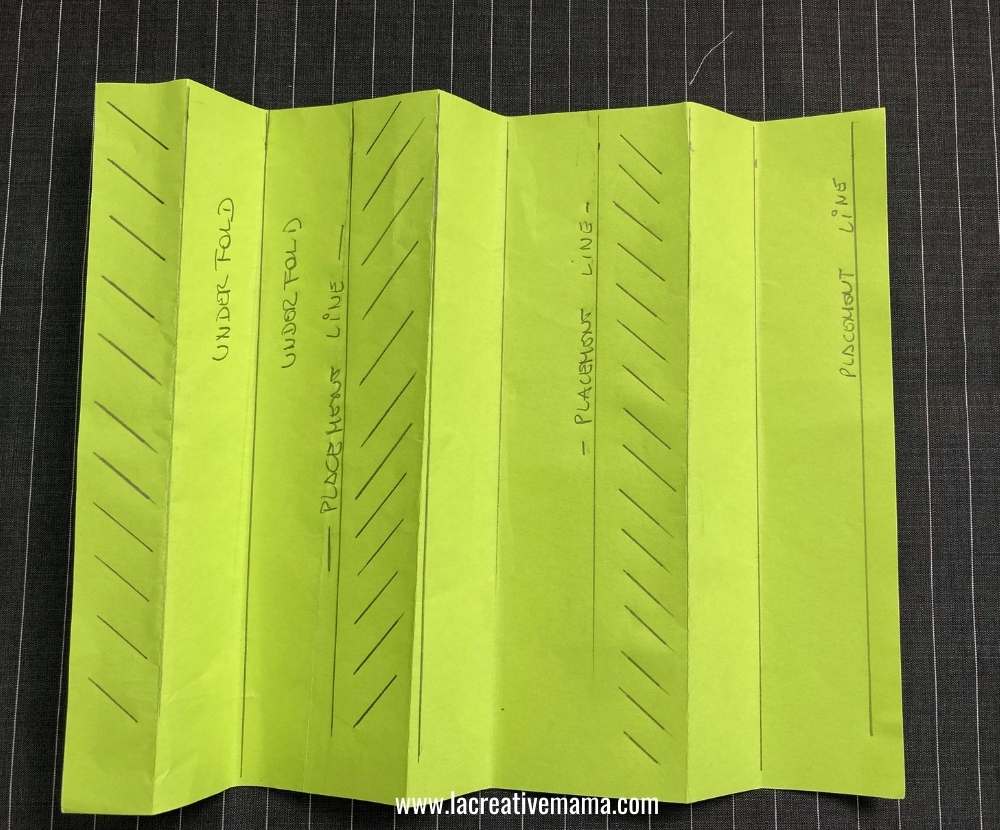
When the fold lines are meeting at the right points (notches) they form a nice knife pleat pattern.

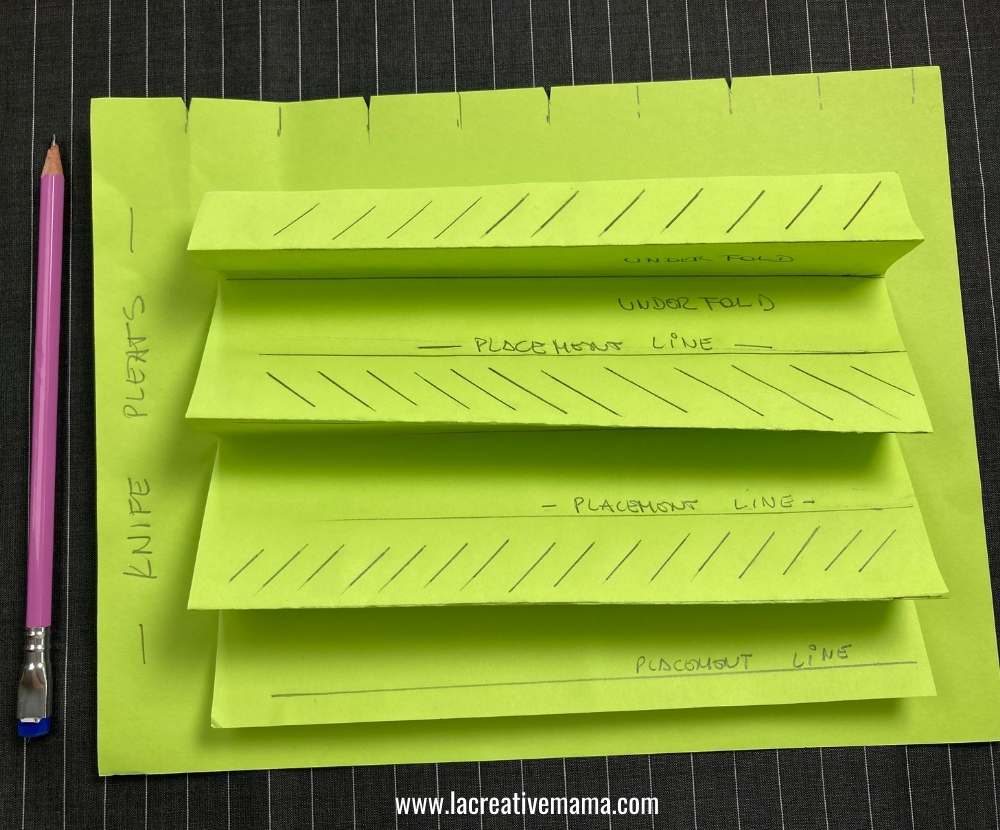
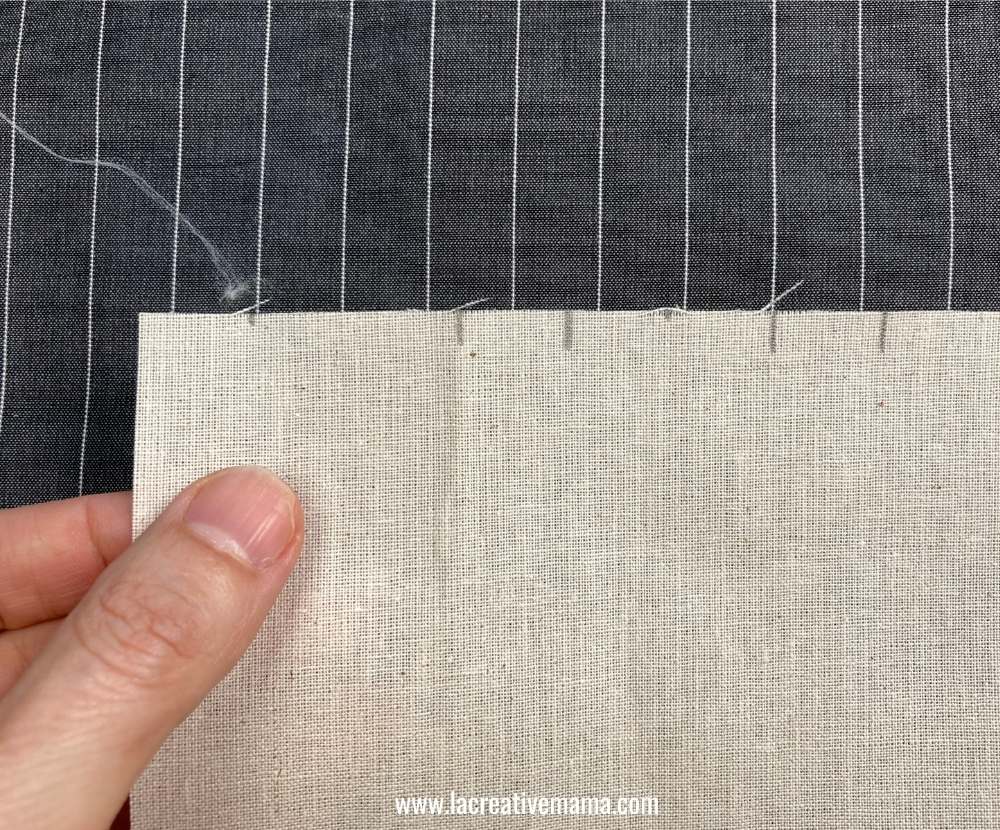
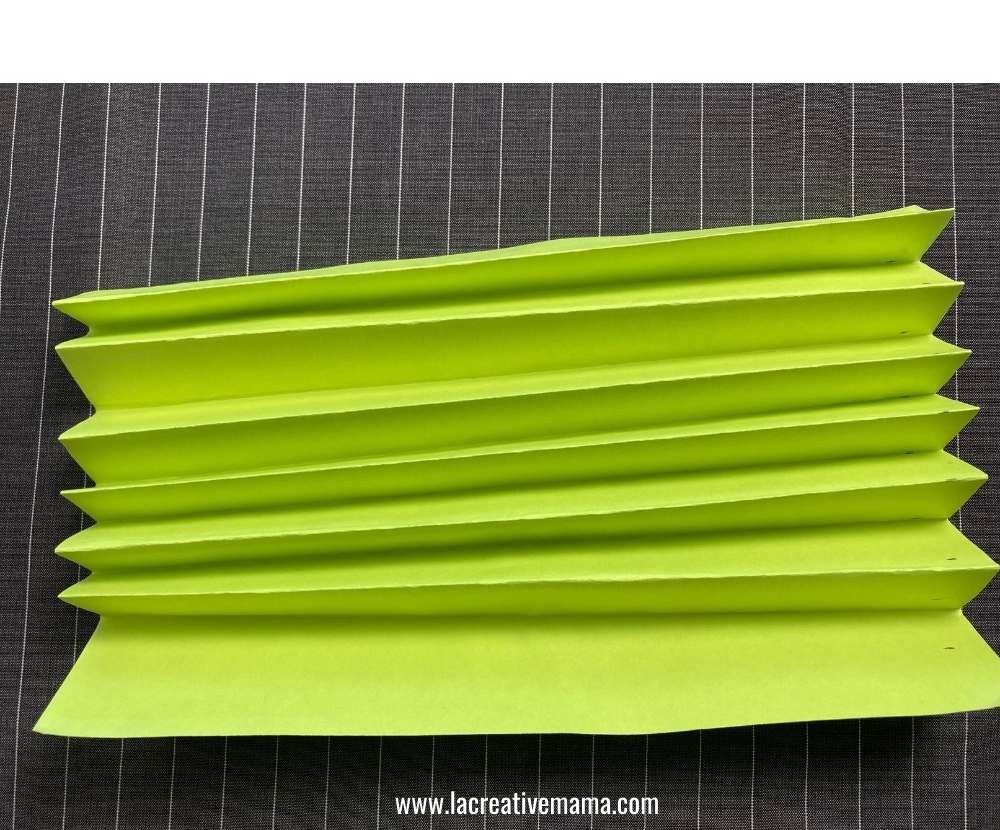
After creating the pattern, you can transfer the notches on a flat paper and this will become your master pattern.
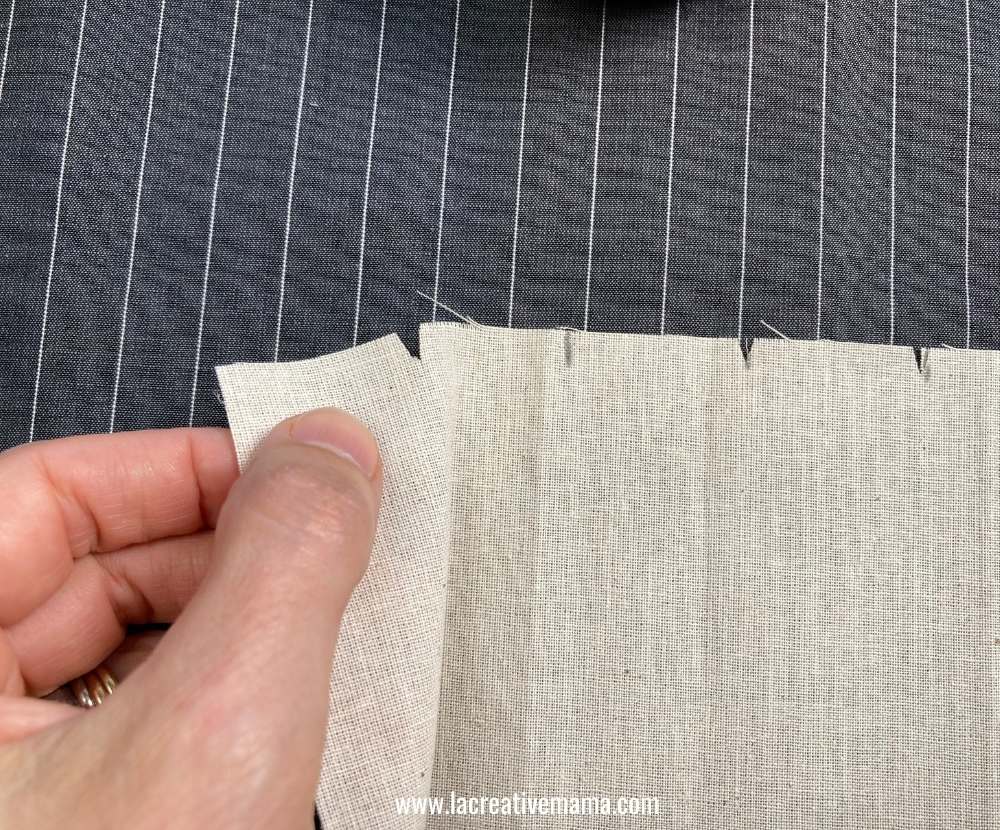
Cut little triangles where the placement lines are so that you know how to fold the fabric once its cut.

You can lay your fabric flat on your working surface and you can move the pattern sideways to mark as many pleats as you need in order to cover your whole piece of fabric.
This saves a lot of time because you have all your pleats marked on the paper pattern and you don’t need to be measuring on the actual fabric.
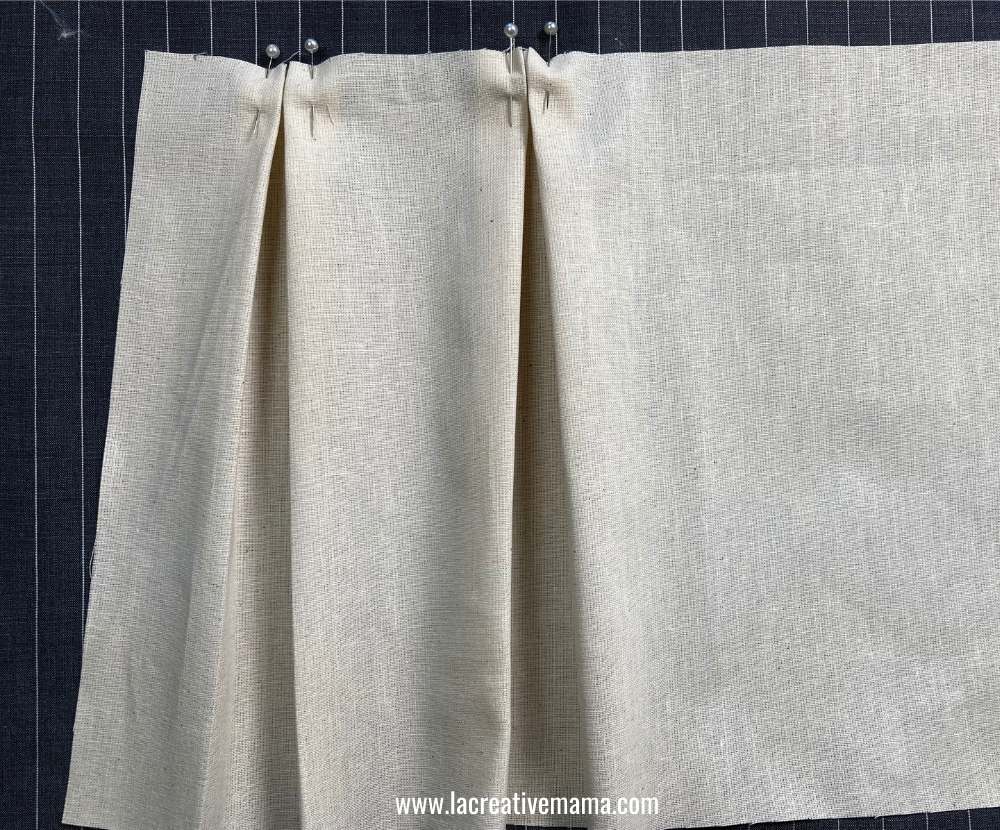
Identify the right side of the fabric. Mark your fabric and cut the notches.

Grab some pins.
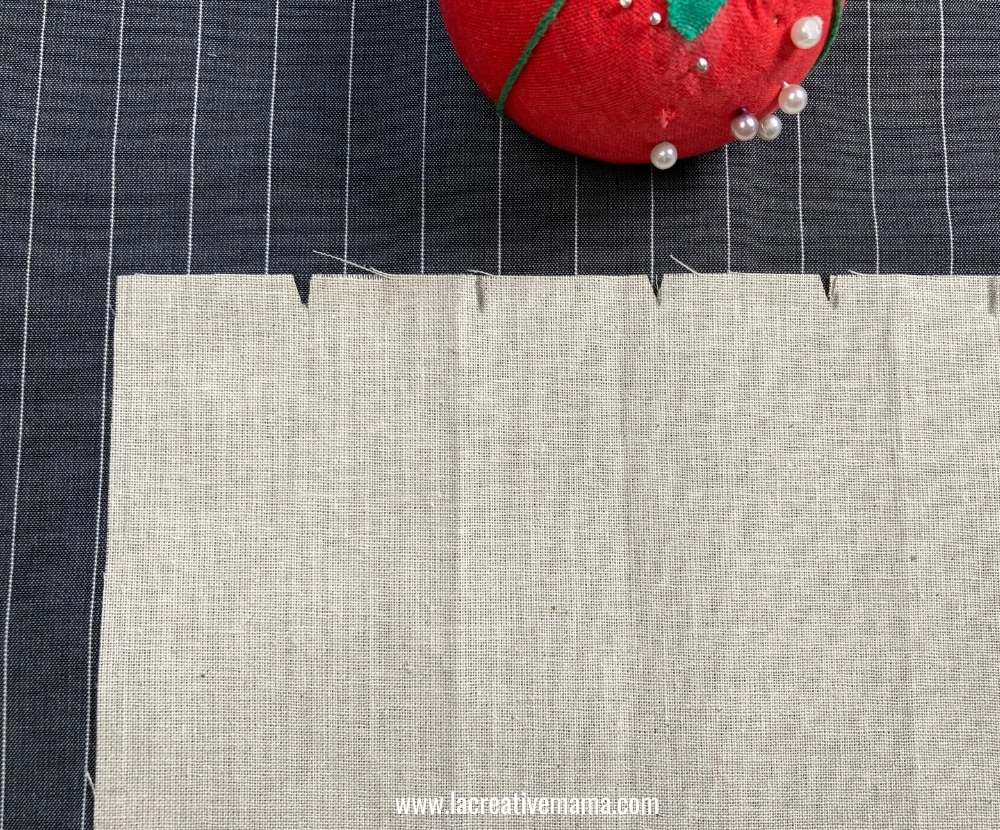
Start folding your fabric following your notches on the placement lines.


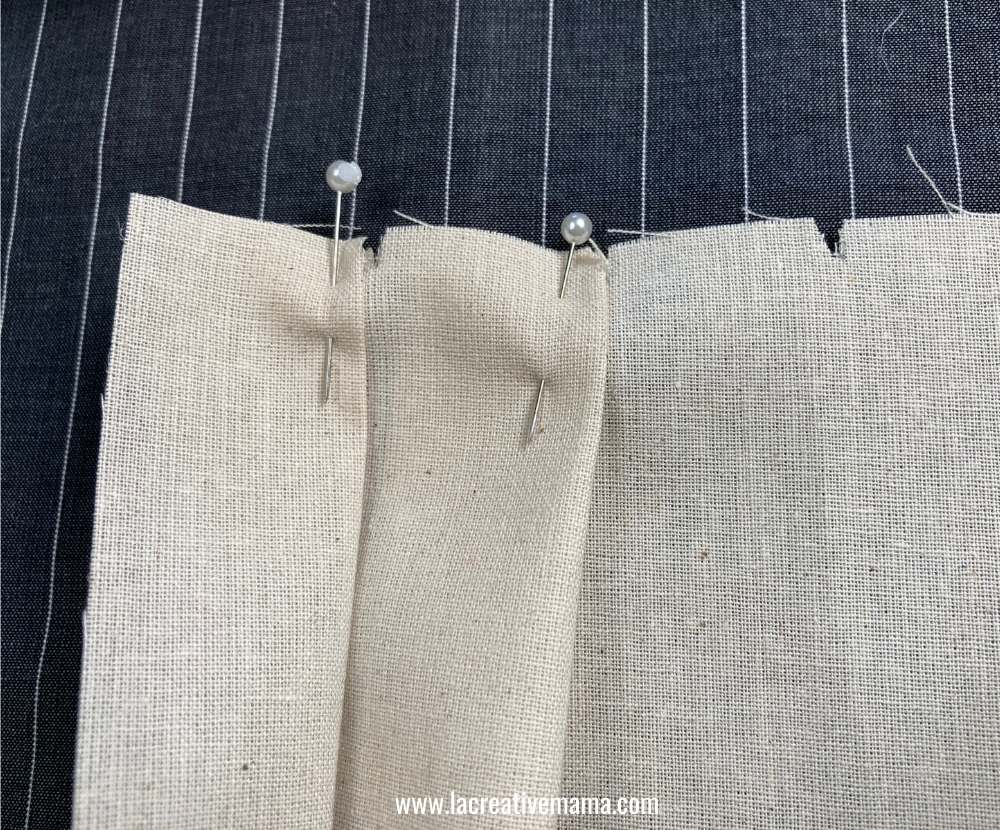
And this is how you create a beautiful pleated surface using knife pleats.
Sew a straight line on the top edge of the fabric .This will hold the pleat in place and will create soft folds.

Inverted pleats tutorial
The inverted pleat follows the same principles as the knife pleat but the fold line measurements are different.
In the inverted pleats there is a big section of fabric that is concealed underneath the top pleats.
These sections are called inner fold and under fold.

For this example I am using the following measurents:
- Pleat depth (diagonal markings): 3 cm or 1 1/4 inches
- Inner fold: 1 1/2 cm or 1/2 inch
- Under fold: 3 cm or 1 1/4 inches
One whole inverted pleat measures 12 cm or 4 3/4 inches.
Fold the paper pattern following the fold lines.

Clip it in place to confirm that you have the correct effect!

Transfer your measurements onto the flat paper pattern.

Transfer the pattern notches onto fabric.
Pin in place.

And this are the lovely inverted pleats both on fabric and on paper.
You can repeat this pattern alongside the fabric as many times as desired.

Box pleat tutorial
I like to think of the box pleat as an inverted pleat flipped to the other side 🙂
The principle is the same, however I have created a specific box pleat pattern which has different number combination to the inverted pleats one to change it up a bit 🙂

Don’t forget your FREE Pleats patterns. Download them now by completing the form below!
Accordion pleat tutorial
The accordion pleats are super easy to make!
Simply mark your pattern using the same measurement throughout.

Fold each section like an accordion 🙂
Keep folding all throughout alongside your fabric/paper.

This is how the accordion pleats look.
They are best to use with stiff fabrics such as silk taffetas or even sheer fabrics. Avoid linen fabrics for this kind of pleat.
Save this tutorial to your favorite Pinterest Board!
Pleats are a great way to create vertical lines and to experiment further with other variations such as cartridge pleats.
You can also have fun using the wrong side of the fabric as well as using synthetic fabrics or natural fabrics.
Pleats are very versatile and lend themselves to many different sewing projects.
You can create wide pleats, narrow pleats, small pleats, you can try different colors for each pleat…
You can also experiment with raw edges at the bottom of your pleats or even sewing a straight line with your sewing machine as a decorative stitch.