Hi Creative Mamas! In this post I will share with you the wonderful work produced by a group of very talented students of mine. We worked together as a group exploring fabric collage techniques as a way to express our creativity, tell our life stories and celebrate community.
This particular creative sewing workshop is part of the work that I do with cultural and fashion sustainability through The Traveling Sewing Box Project (C) and it was produced in association with RASNZ Refugees as Survivors New Zealand .
The result was simply amazing. Find out how these creative mamas managed to turn fabric collage into a fabric journal that has become a precious keepsake for themselves and for their families.

There are many different ways to get creative with sewing and fabric crafts. Whether you are into hand sewing or machine sewing you probably enjoy the act of making and creating something new with your hands.
Working with fabric crafts is very therapeutic and mostly satisfying and the best thing about it is that when you are making fabric collages there are no rules!
If you have been following my blog you will know that I like making easy meaningful crafts that allow us to express ourselves and helps us show our love and appreciation for others. Making handmade gifts for a loved one is a very special thing but making a handmade gift for ourselves is even more special.
In this post I will show you how you can follow some simple steps to create a fabric collage and turn it into a fabric journal as a gift to yourself.
Fabric collage definition
The best definition that I can offer is one that came from one of my first lecturers at university. She defined collage as the act of de-constructing a set reality and re assembling it as a new reality with a new perspective.
I always loved this definition and it has allowed me to think about my sewing in a more creative way. I have always used fabric collage as a vehicle to upcycle and repurpose old fabric scraps. It has allowed me to create stories by adding layers of material and developing my own fabric collage techniques.
Fabric Collage Ideas
All my life I have been involved in the fashion industry in one way or another. Somewhere along the line, I developed a passion for teaching and for sharing my ideas about repurposing and upcycling fabric scraps. Creating meaningful fabric collages that had cultural meaning is a great way to express ourselves and to have lots of fun too 🙂
Some ideas to incorporate in your fabric collage pieces:
- Using fabric scraps
- Using old worn out clothes that have a special meaning to you
- Using photos from your past as fabric collage pictures (You can print them on fabric or embroider them)
- Naturally dyeing your fabrics to create your own colors
- Incorporating yarn and trims to make it more personal
Easy fabric collage
You can make super quick and easy fabric collages by following this simple 3 step process. Once you have your collage pages already made you can turn them into fabric journals or fabric collage books.
Let me show you the process that my students from The Traveling Sewing Box Project in association with RASNZ went through to turn their own fabric collages into a fabric journal.
How to turn fabric collage into a fabric journal
The idea of making a fabric journal is to create a fabric collage book that will last forever. As with any book, this book will tell a story. What story this book will tell is up to the maker. And that’s the magic! We all have different and unique stories to tell!
A fabric journal also gives us the opportunity to keep updating them. A journal is a place where to write our thoughts, reflect and reminisce. This is exactly what these fabric journals do for us. They provide us with a space to keep reflecting about ourselves and a place to stitch daily thoughts and feelings.
I will show you the step by step process followed by Maria, one of the amazing students who participated in The Traveling Sewing Box Project (C) in association with RASNZ.
Most of the fabric collages and fabric journals in this workshops were all handsewn using very simple embroidery stitches such as :
- Blanket stitch
- Whipstitch
- Backstitch
- Running stitch
- French knot
- Laizy Daisy
- Satin stitch
You can also use a sewing machine if that’s your preferred sewing method, remember there are no rules 🙂
Fabric Collage Pictures
I always provide my students with applique templates in order to make it easier to get started. Downloading these free applique templates is great because it gives you an easy way to start cutting fabric and choosing colors. It’s also a good way to feel the fabric in your hands and start making decisions about the type of textures that you want to work with.
The Free Collage Applique Patterns are available in my free resource library — get the password for free by filling out the form below.
Fabric Journal Tutorial
Materials: (You can upcycle any of these)
- Old linen
- Old table cloths,
- Outgrown kids clothes
- Old adult clothes
- Fabric scraps from old projects,
- Old pillows and cushions.
- Free Collage Applique Patterns are available in my free resource library — get the password for free by filling out the form above.
Equipment:
- Hand sewing needles
- Embroidery thread
- Regular thread
- Fabric scissors
- Paper scissors
Step 1: Cutting the Fabric Collage Applique Templates
The first thing to do is to cut around the paper templates. These little shapes will be the building blocks for the fabric collage pages which will be turned into a fabric journal.

Step 2: Making fabric collage pictures
From this step onwards I will show you the steps that Maria took in order to make her fabric journal. The materials used for these fabric journals were all fabric waste from the New Zealand fashion industry.
As described in the full Fabric Collage Tutorial, Maria cut the applique templates and she placed them on top of her base fabric.
Maria started sewing the house blocks to the base fabric by using embroidery stitches. She played with different thread colors to create some more visual texture.

Maria designed her house by cutting little blocks of fabric and playing around with different shapes.

Maria kept building her fabric page by adding different layers of materials.
We discussed her ideas in each class and she kept working on her fabric collage pages throughout the weeks. Week after week the stories evolved and the fabric book started coming to life.

Maria used a running stitch in a contrasting color to tittle this page.

Once Maria felt that this page was finished she placed it on top of another base fabric. She finished it by folding the base fabric towards the fabric collage and embroidering a chain stitch.

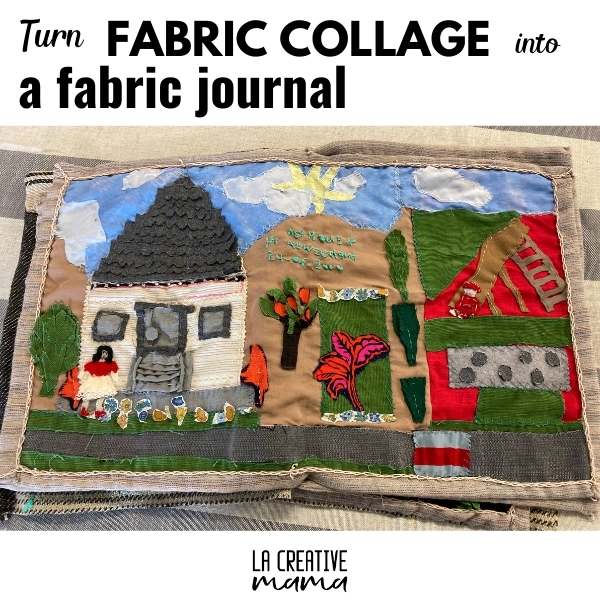
Maria created a wonderful fabric journal that tells her migration story from her homeland into New Zealand. Each page is a reflection on her own memories of her birth place, her appreciation for her current adopted country and an overall celebration of her life’s journey.
The work that was produced during this workshop was incredible and a true testament of how much can be said and shared through creative sewing.
Step 3: Making the fabric journal
Once all the pages were completed (Maria created 3 double pages), it was time to make the book cover. She decorated the fabric book cover with her name, the tittle of the book, the date and images and materials that resembled her creative process.
Natural dyeing and felting were also techniques that were explored during The Traveling Sewing Box Project (C).
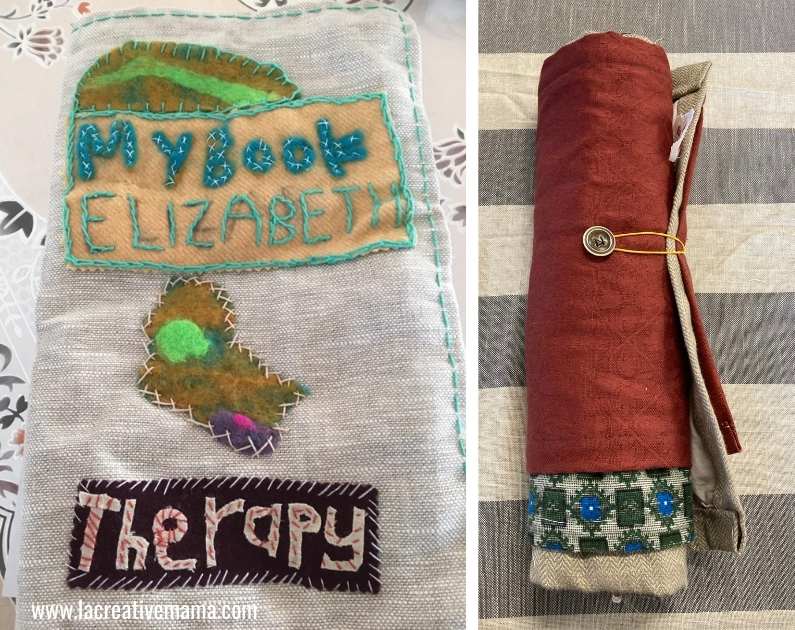
The picture below illustrates the book cover which contains the wonderful double pages inside.

This is the first double page and it tells a story about Maria’s birthplace.

This double page documents the date in which Maria came to New Zealand and how colorful everything was to her eyes.

This double page makes reference to a historic landmark in Maria’s hometown.

How to make fabric journal covers
There are many different ways to make a fabric book cover. I always leave the cover for the end of the project. Here are some ideas that you may like to consider when designing the cover:
- Measure how much fabric you need including the depth of the spine. Allow a generous hem so that you can self bind the edges.
- Create a cover made up of different fabric
- Create a cover that rolls in itself
- Make sure the cover represents the inside of the fabric book
The illustrations below show a few different fabric journal cover options made during the workshop by different students.

I love the traditional book shape for my fabric journals but you can also experiment with rolling your double pages and closing them with a button and elastic.

Fabric journal pages
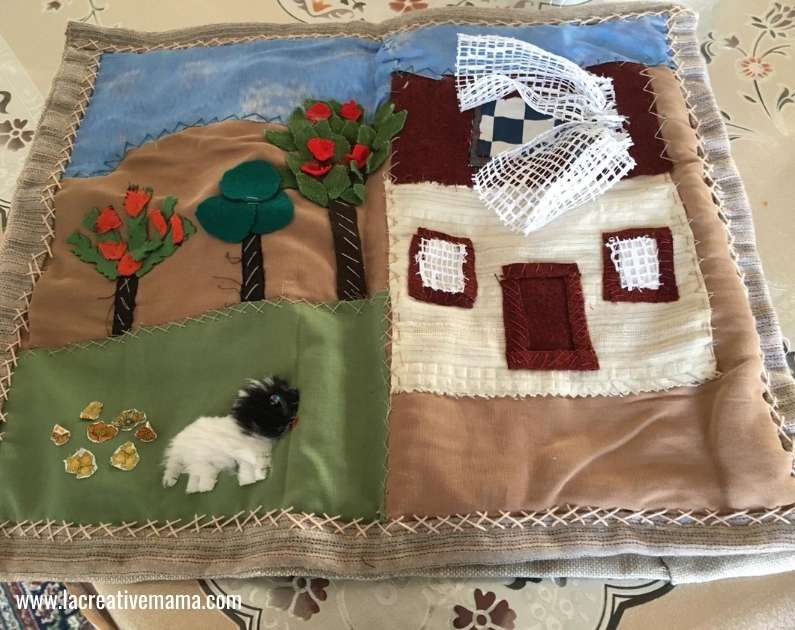
The photos below are examples of different fabric collage pages that were created by this amazing group of students.

The fabric collage page above was made by Kalorian

The fabric collage page above was made by Kalorian

The fabric collage page above was made by Muna

The fabric collage page above was made by Samia

The fabric collage page above was made by Margaret

The fabric collage page above was made by Elizabeth
As I mentioned at the beginning of this tutorial, a fabric journal allows us to keep stitching in them. These journals will keep growing over time and will keep telling life stories.
Part of my creative sewing practice is to keep fabric journals. I love making these. I particularly like making fabric quilt collage and turning it into a fabric journal
How to make a fabric quilt collage
Here is an examples of a quilted fabric collage which was turned into a quilted fabric collage journal. I started this journal many years ago and it keeps evolving and growing. It’s my craft therapy!
This particular fabric journal is all about my travels and my experiences settling and growing roots in New Zealand.
I use this journal as an example in all my live fabric collage workshops. This is an ongoing journal and will keep getting bigger as the years go by 🙂


I hope you have enjoyed this tutorial and please reach out with any questions that you may have. You may also be interested in these other fabric book tutorials:
Save this tutorial to your favorite Pinterest Board

