Hi Creative Mamas! I want to share with you my version of a tie dye mask DIY. It seems that we will be using fabric face masks for a while so I decided to wear them in style.
As you may know, I am super passionate about naturally dyeing my fabrics and that includes creating patterns through tie dye.
This DIY face mask is made with one of my most popular face mask patterns to ensure a secure fit around the face.
Check out the video instructions below for a quick outline of the tutorial
It uses my favorite tie dye pattern which is a resist dye technique using rubber bands.
You can tie dye using a tie dye kit but I always use eco friendly natural dyes. You can use a variety of natural dyes.

Make sure when you rinse your tie dye fabric the cold water runs clear and there is no dye bleeding from the fabric.
This DIY tie dye mask has double-layer fabric but you can easily make it using three layers.
DIY tie-dye mask tutorial
This post contains affiliate links, which means I receive a small commission, at no extra cost to you, if you make a purchase using this link. Please see my disclosure for more details
Materials and equipment
You need a good working sewing machine
- Tie dyed fabric using the resist technique with rubber bands explained in this tutorial
- Elastic
- Fabric Scissors
- Iron
- Free face mask pattern ( (available in my FREE RESOURCE LIBRARY— get the password for free by filling out the form below)
- Aluminium strip nose wire (optional)
Great new option: elastic and aluminium strip bundle!
Step 1
Grab your tie dye fabric for the outside layer of the mask. In this case I am using a tie dyed cotton fabric naturally dyed with cochineal.
You can create your tie dye pattern using any dye colors that you like.

I am also using a plain hand dyed silk fabric for the lining. I dyed it with Eucalyptus and it’s still smells amazing!
Download the mask pattern and print it out.

Cut the mask pattern. I am making adult size masks (medium) for myself but the pattern comes in 3 different sizes.
Check and make sure that the size fits well before you sew it completely.

Place the pattern piece on the straight grain.
Cut around the pattern. Please note this pattern doesn’t include seam allowances so you must add 1 cm or 1/4 inch.

Cut 2 tie dye pieces and 2 solid color pieces for the lining. You need 4 pieces in total 🙂
Step 2
Cut 2 elastic pieces. This measurement varies person to person but as a guide it will be around 6 inches or 15 cm each elastic piece.

Place the 2 tie dye pieces side by side. Repeat with the lining pieces.

Pin the 2 top pieces and the 2 lining pieces right sides touching and sew them together.
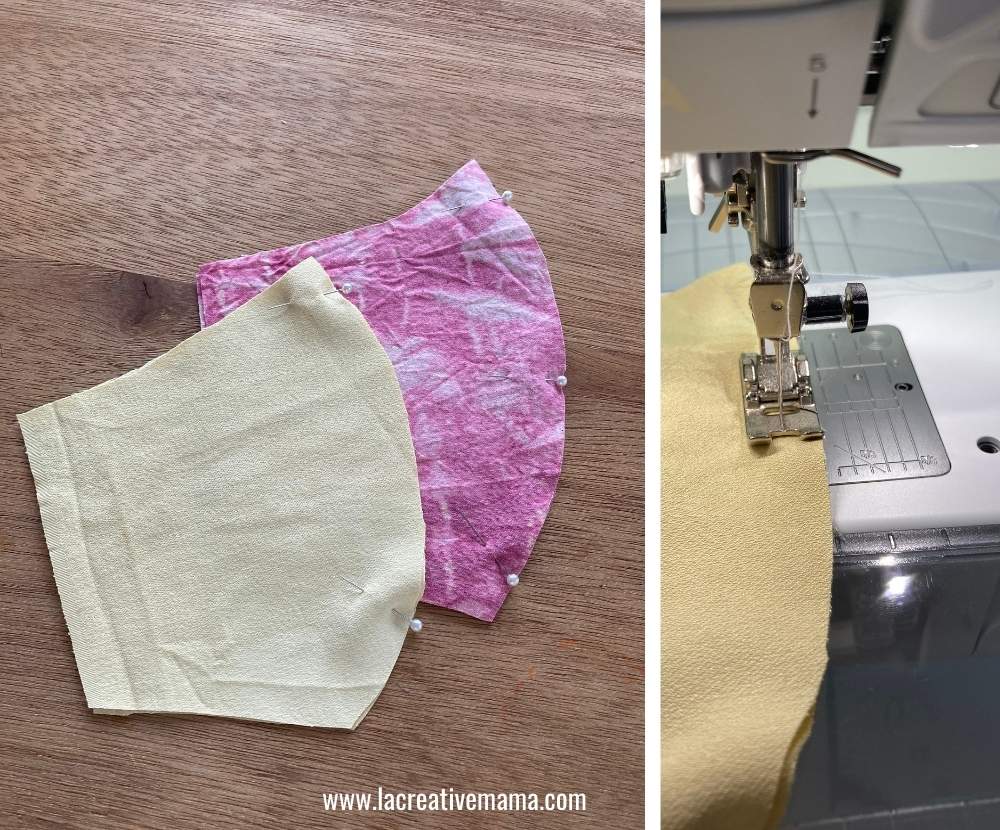
Press the seams open.

Step 3
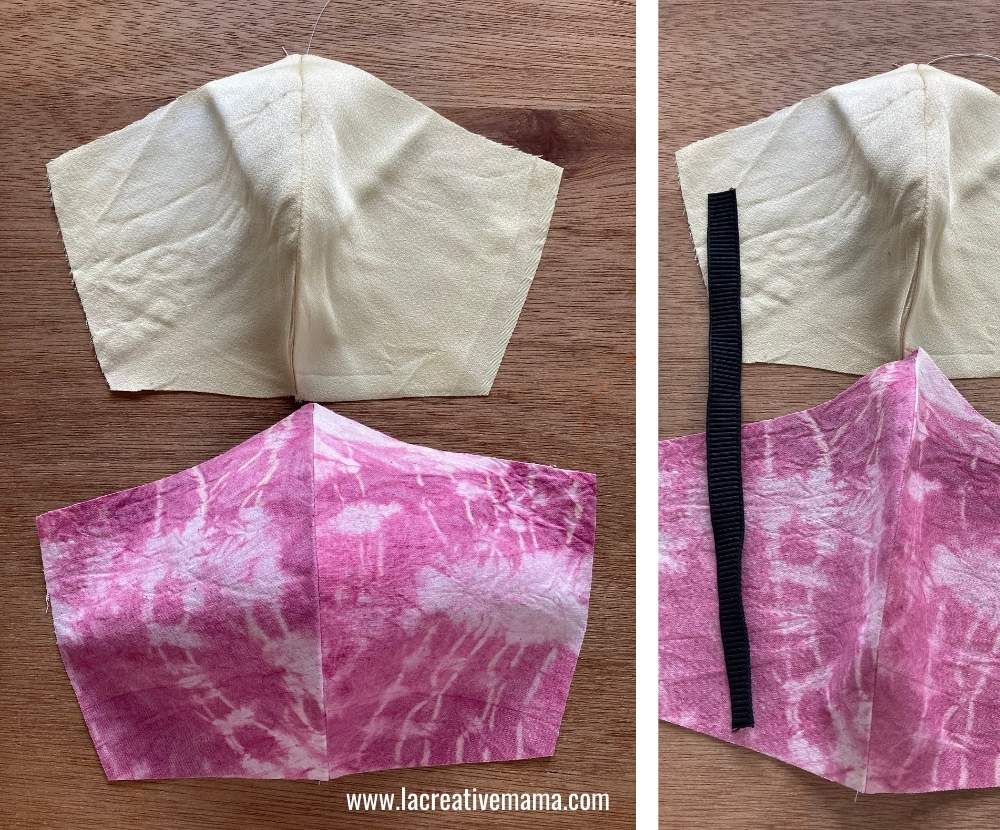
Place the 2 layers on your working surface and pin the elastic pieces to each side of the face mask.

Sew a stay stitch so that the elastic doesn’t move during the next step 🙂

Place the 2 layers together right sides touching and sew around the edges making sure to leave an opening on the lower side of the mask.

Make sure that the mask is pinned in place all around before going onto the sewing machine 🙂
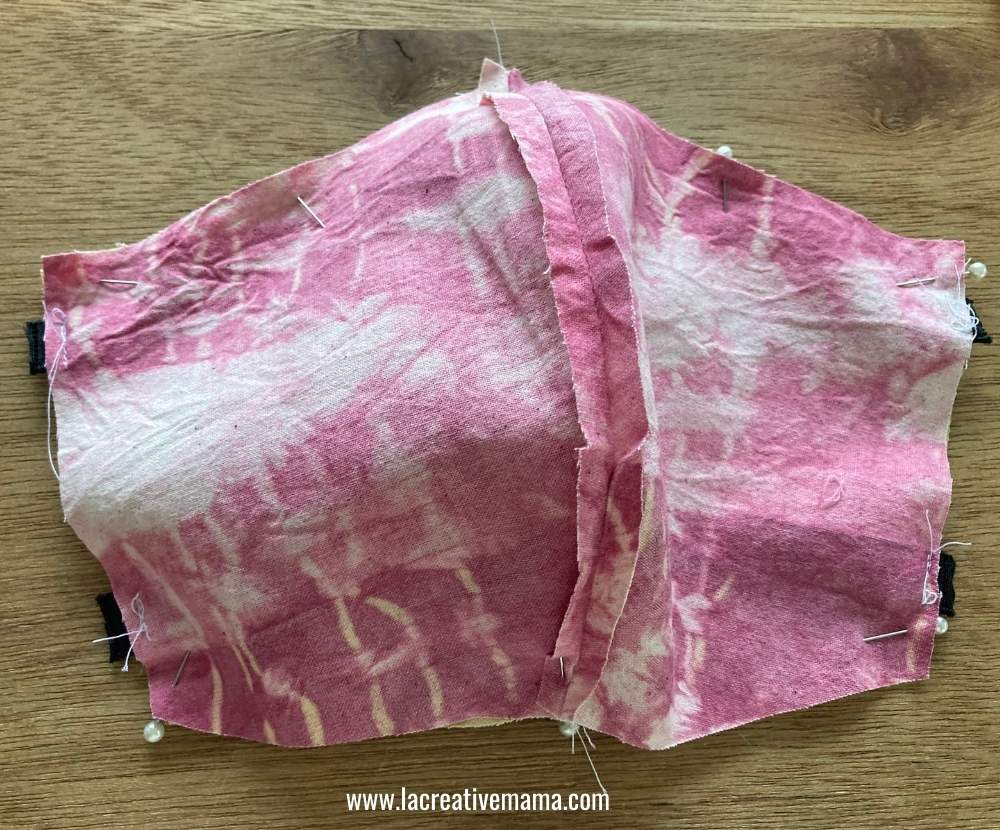
Clip the corners and flip the face mask inside out through the opening.

Give your tie dye mask a good press and close it either by hand (you can even use embroidery stitches) or you can top stitch all around it with the sewing machine.
Both options work really well! Voila! Your DIY tie dye face mask is completed!!!!

I hope you enjoy this way of making an eco mask. These are the coolest tie dye face masks ever and so easy to make!
Unlike chemical tie dye techniques, natural tie dyeing doesn’t require a plastic bag, a plastic wrap or squeeze bottles.
These tie-dye face masks are great projects that use tie dye designs which are dyed using high heat. The good news is that they are great summer crafts and you can make a bunch of masks all at once!
Note: You can also create your resist patterns by using food coloring!
For a variety of patterns and styles you can check my many face masks tutorial here.
Here are some of my favorite ones: