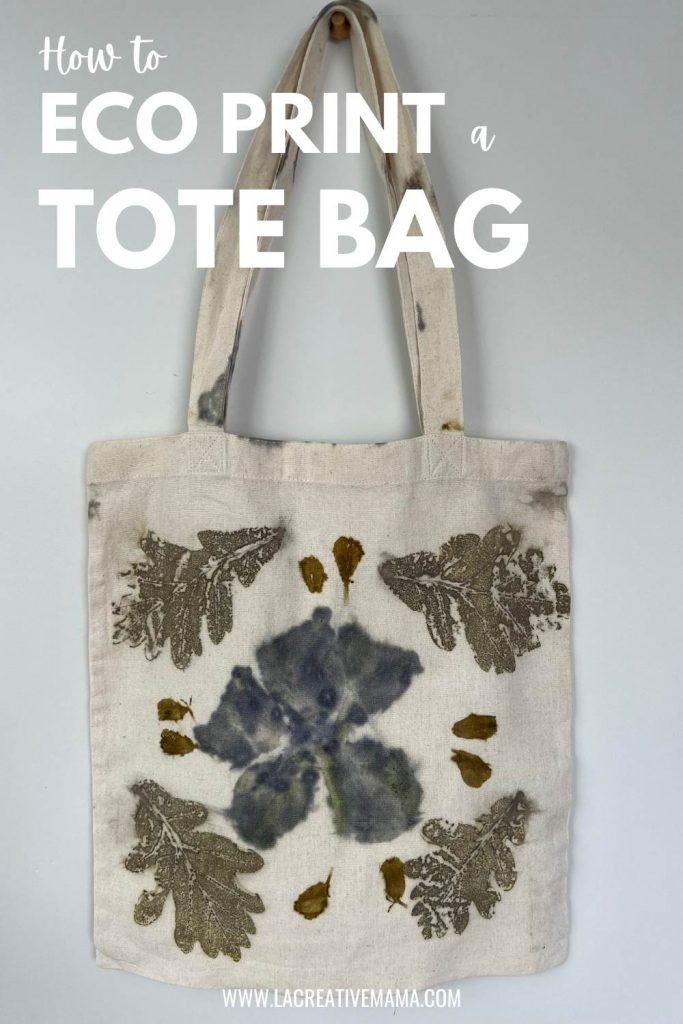
Hi Creative Mamas! In this post I want to show you how to eco print a tote bag using leaves and flowers.
This is a super easy and quick technique and a great way to upcycle old cotton tote bags or even transform the free cotton grocery bag that we get from some shops. You can also use eco printing techniques in combination with natural dyeing.
For this tote bag design I have used oak leaves, hibiscus and marigold petals from my dye garden.

You can check out the Eco Printing Guide in case you are new to eco printing fabrics. Upcycling with eco printing techniques is a great way to create an amazing DIY Fashion wardrobe!
You can also explore eco printing on paper which works in a similar way as when we are printing on cellulose fibers such as cottons and linens.
This tote bag project uses the same sustainable natural materials as this eco printed purse which was made using blankets and cochineal dye.
Eco printing a tote bag tutorial
Materials & Equipment
- 100% cotton tote bag (old or new), scoured and mordanted
- Leaves and flowers (choose any plants from this list) or you can download your free list by completing the form below.
- Plastic sheet (I use rubbish bags or recycle a plastic bag)
- Plastic or wooden rod (for rolling the eco print bundle)
- Steamer
- Rubber gloves and face mask for protection
Download your FREE List of the best 30 plants to eco print
Step 1: Mordanting for eco printing
Prepare your cotton tote bags for eco printing by making sure that you wash them and mordant them.

Please read the instructions on how to scour and mordant cellulose fibers (cotton) in the ultimate guide to natural dyeing. Go to the Scouring and mordanting section.

Mordanting is a very important step in the eco printing process because it will prepare your fabrics to absorbs the natural dye from the leaves and flowers.
Check out this post for more information about mordants for eco printing.
For this project I used a combination of alum and iron as mordants. I used 1% WOF (weight of fiber) of ferrous sulphate and 25% of Alum Acetate as in this t- shirt upcycling project.

Step 2: Eco printing a cotton bag
Place your mordanted and wet tote bag on your working surface. Stretch the fabric really well to remove any bubbles.

Start placing your flowers and leaves to create a nice design.

For this tutorial I placed a red hibiscus flower in the center and oak leaves around it. Eucalyptus leaves are always great to use as well and available all year round.

I also added some loose marigold petals for extra color detail.

Once you are happy with the design, place the plastic sheet on top pressing really well.

Roll the eco print bundle by placing the plastic or wooden rod and rolling it away from you.

Roll the tote handles around the bundle.

Place your bundles in the steamer and steam for exactly 60 minutes. The tote in this project is the one in the middle on the photo below

Remove from steamer and let it cool down. Open the eco printed bundle and SURPRISE!
This is my favorite part of the process, it’s always such a joy to open these little bundles of joy!
The photo below shows the tote bag after unrolling it.

Give it a good rinse to remove all leaves and flowers and wash by hand using a delicate soap. You can also machine wash at this stage.
Press with a hot iron and your tote bag is ready to go!

Care instructions: You can wash in a regular washing machine cycle with cold water or hand wash your tote bag, both options are great!
I hope you have enjoyed this tutorial. You may also like to learn how to eco print old socks and how to upcyle an old cotton t shirt using eco printing techniques!
This tote bag project uses the same sustainable natural materials as this eco printed purse which was made using blankets and cochineal dye. However the final results are completely different!
Please reach out with any questions that you may have.


It was so awesome…..I appreciate your work.