
Hi Creative Mamas! In this article I want to share with you one of my most exciting moments in natural dyeing which is the day that I discovered how to make my own black color with natural dyes!
I will share with you exactly how to make natural black dye with acorns. YES! Acorns! The humble little acorns that fall on the ground every Autumn.
You can create beautiful tones of gold and ochre with acorns but you can also modify them and turn them into greys and blacks.
Acorns come from oak trees and we have lots of them here in New Zealand. When my kids were little we used to go and collect acorns at school just for fun.

One day I gathered a lot of them and decided to do a little test with natural dyeing.
The results were that the acorns produced a beautiful ochre goldie color when used to dye silk and wool using the Hot Dyeing Method.
Unfortunately, the results were not the same when I tried using acorns in wool and silk using the Solar Dyeing Method. ( I even left the acorns in the solar dyeing jar for six months and still I got no color out of that process).
However, the color that I got from the Hot Dyeing Method was so amazing that I got curious and stared playing with color modifiers.
Get ready to learn how to make natural black dye at home!

In this tutorial I will show you how to make natural black dye with acorns using iron water as a color modifier. But first let’s get started in extracting that beautiful gold color from the acorns.
For this tutorial we are going to focus on protein fibers such as silk and wool. Fiber classification and knowing exactly what fiber you are working on is critical in natural dyeing because you need natural fibers to be able to absorb the natural dyes.
So, it’s very important that you do a fabric test to ensure that your wool is 100 % wool and it’s not acrylic and the same goes for fabric.
So, always do a Fabric Burn Test to be sure you you have 100 % natural fibers. Natural dyeing will only work on natural fibers
For this tutorial we will cover the following processes
- Scouring Process
- Mordant Process
- Dye Extraction/Dye Bath
- Hot Dyeing Method
- Modifiers
This post contains affiliate links, which means I receive a small commission, at no extra cost to you, if you make a purchase using this link. Please see my disclosure for more details.
Materials & equipment
- Acorns
- Mordant agent: Allm, (Aluminium Sulphate) since it’s the safest option for myself and for the environment
- Pots and pans (whatever you use it can never be used to cook food again!)
- Stirring wooden spoons
- Strainer
- Neutral PH soap
- Heat source
- Plastic jug
- Scale
- Rubber gloves and face mask
- Plastic bowl and bucket
- Silk and or wool (You always need natural fabrics or yarns)
- Iron water (You can download the FREE IRIN WATER RECIPE by completing the form at the bottom of this post)
- You will need access to plenty of cool water
Before you start make sure that you weigh your fabric. My fabric weighs 200 grs and its a mix of wool fabric and silk fabric.
Tutorial: How to make black dye with acorns
Step 1 & 2: Scouring Process and Mordanting Process
It’s very important to ensure all fibers are clean from oils, dirt and industrial processes and that’s why we need to scour the fabric.
Also we need to make sure that the fabric is pre treated through a mordanting process to open the fibers to receive the color dyes. Please refer in detail to Scouring and Mordanting Processes here.
Make sure to start the scouring and mordanting process by filling the dye pot with cold water to avoid felting in case you are dyeing wool fibers.
For this tutorial I am using the following recipe: 10 % Alum WOF (weight of fabric).So I started with 200 grs of fabric and yarn so I am using 20 grs of Alum.
Step 3: Dye Bath/Dye Extraction
OK, so this is the most fun part.
- Fill a big pot with hot water and the acorns
- Bring to a simmer. Keep simmering for 1 hour.
- Turn the heat off and let it cool naturally. You can leave cooling overnight.
- Strain and use as dye bath.
- My rule for dyeing with acorns is 300% WOF (weight of fabric)
PRO TIP: after extracting the dye allow the dye and the acorns to cool. Leave overnight to extract as much color as possible. Strain the next day.

Step 4: Hot Dyeing Method (Dyeing process)
Transfer strained dye bath to a stainless steel pot. Fill with more clear water. Add the mordanted and pre wetted fiber to the dye bath.
Make sure there is enough space in the pot so that the fabric and yarn can move freely.
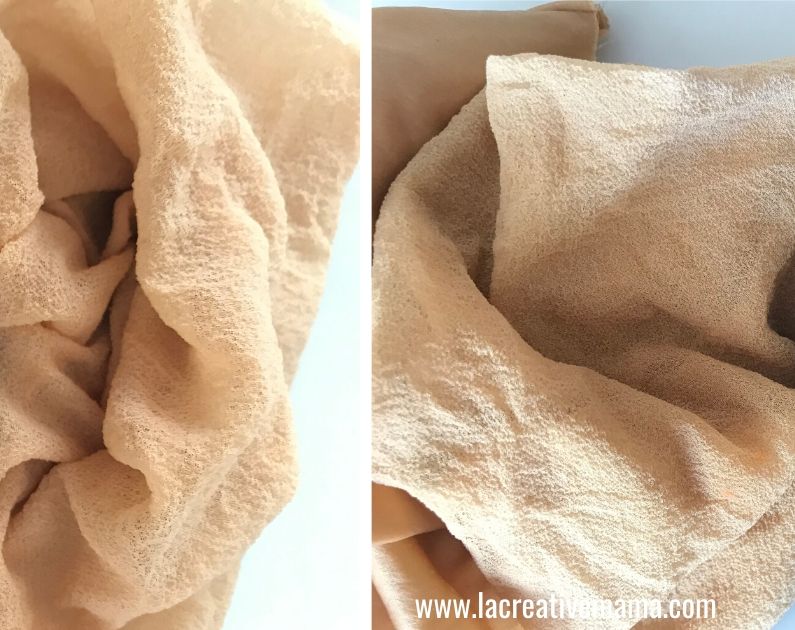
Slowly raise temperature to a simmer. Simmer for 1 hour. Remove from the dye bath. Rinse fiber in lukewarm water. Make sure the water runs clear of dye.
Hang it to dry away from sunlight. The illustration below show you the beautiful gold color that I got from the acorn dye bath. Just beautiful!!!!!!
How to make black dye with acorns?
So let’s turn this beautiful gold dyed fabric into a darker color such as dark charcoal grey or black. First you need the iron water.
Download your Free Iron Water Recipe PDF
For a detailed step by step illustrated tutorial on how to make your own iron water read here.
Step 5: Modifying color using iron water
Allow the dye bath to cool to room temperature. Pour the iron water into the acorn dye bath by mixing a 1:1 ratio of the iron water and clear water. Stir.
Place your wet fabric (gold dyed silk or wool piece) inside the dye bath again. Make sure that the fabric is wet before it goes inside the dye pot.
Stir to make sure that the fiber is moving freely and that the modifier is reaching all areas of the fiber.
In this case the color changed almost immediately so I just kept stirring and checking the color all the time. See in the illustration below the change in color. This only took three minutes!

Keep stirring and checking the fabric. After six minutes this was the resulting change in color! Illustration below.

After ten minutes of constant checking and stirring I was happy with the color. It was a rich black color.
Once you have obtained the desired tone just simple remove from the dye bath, rinse super well and wash with a PH neutral soap to remove all sediments of iron from the fabric.

This is the beautiful black that I was able to create by dyeing with acorns and modifying with iron water 🙂

Modifying color with lemon juice
Another great color modifier is lemon juice. You can also use vinegar to create different after dye effects. You will need to dilute part vinegar and part water.
You can also use vinegar fixative at the end of the dyeing process by rinsing the excess color in clear water and s little but of vinegar.
How to dye your clothes black naturally?
Make sure you are dyeing a garment that is 100% silk or wool.
Follow the steps outlined above but make sure that your pot is big enough and that the proportions of the weight of fabric and the weight of acorns is the same as in this tutorial. always keep it to 300%.
More natural dyeing tutorials:
You can also create beautiful dye color using yellow onion skins, avocado skins. These food scraps can create amazing natural color and they make the best dyes.
Check out these best tips for using avocado dyes.
Note: Going to the grocery store to get red cabbage and black beans is not a great idea and won’t provide you with good consistent natural color.
It’s also a good idea to experiment with plant dyes and other natural materials (plant material) that make great fabric dye.
You will be able to make vibrant color by following the described dye process in these tutorials:
Fabric Printing With Natural Dyes
Natural Bundle Dyeing, make your own DIY scarf
The Beginners Guide to Solar Dyeing
I hope you have enjoyed learning how to make natural black dye at home and that you can see the endless possibilities available to you through natural dyeing.
I have certainly enjoyed dyeing my fabric black and I have dyed larger pieces of fabric as well as old clothes in this exact way 🙂
I’m a bit confused by the modifying step. Are you saying you first dilute the iron water 1:1 with clean water and then add it to the dye bath? How much iron water do you use?
Hi ellen, sorry for the confusion. So after the fiber has been dyed you remove it from the dye bath, let the bath cool down. On the meantime, grab a jar and mix the iron water (which its already prepared and ready to go) with clear water from the tab. I normally use 1 cup of iron water mixed with 1 cup of clear water, I then add this iron diluted water inside the dye bath. this will modify the color.
Does this make sense? Cheers!
Hi Victoria,
Thanks you for the great instructions. So much pleasure to make!
I used Ironsulfate from a garden centre instead of rusty nailes and that seemed to work very fine aswell.
In the first place the dye got a really nice deep grey when I got it out of the bath, but after washing it with a soft soap the fabric turned out into a light brownish color. Really nice aswell but I was wondering if you have any suggestions on that?
Maybe it was the fabric because it was already whitened cotton?
Thanks!
Hi Marianne, so sorry for late reply, I thought I had answered this question and I obviously didnt, apologies, ok so the fabric I used for this tutorial and has never failed for me is silk, sometimes cotton takes on to other darker shades and that will have to do with a variety of factors such as the type of cotton, the weave, the amount of iron, how well mordanted it is , etc.so to answer the question I have always achieved those dark charcoals/blacks from using silks and I should mention that each type of silk quality comes out a different tone of grey/black as well. Hope this helps!!! Cheers