The Ultimate Guide to Natural Dyeing
Hi Creative Mamas! Welcome to The Ultimate Guide to Natural Dyeing. I have been dyeing for at least twenty- five years, but my natural dyeing practice started fourteen years ago while I was living in Asia. I have used natural dyeing in combination with slow sewing as a way to connect to the environment around me.
I have practiced natural dyeing as craft therapy and it has been an amazing source of calmness and joy. I am excited to bring to you this Ultimate Guide to Natural Dyeing so that you can get started in your own dyeing practice with as much knowledge as possible.
In this post I will be covering Natural Dyeing which obviously uses natural dyes, which is the oldest way of dyeing. Our ancestors used to dye all their cloth naturally using plant materials, leaves, roots, bark and flowers, as well as veggies, fruits and insects.
Even though natural dyeing takes longer and the results cannot always be predicted, this method allows you to produce the most magical, intense and bright colors ever! This is The Ultimate Guide to Natural Dyeing and your intro to the magical world of natural dyes.
This guide is the result of many years of natural dyeing practice and a quick shortcut to the main info you need to know to get started and to be successful straight away! If you follow the info below you will be able to create beautiful colors in no time.

Natural Dyeing Guide Contents:
1-What is Natural dyeing?
2-How to get started with dyeing fabric and yarn?
Steps in the dyeing process.
- Fiber classification.
- Weighing the fabric
- Scouring
- Mordanting
- Dye Extraction
- Dye Process
- Using modifiers to expand the color palette
- Washing
3- Natural dyes
4- Natural dyes recipes
5- Different methods of natural dyeing
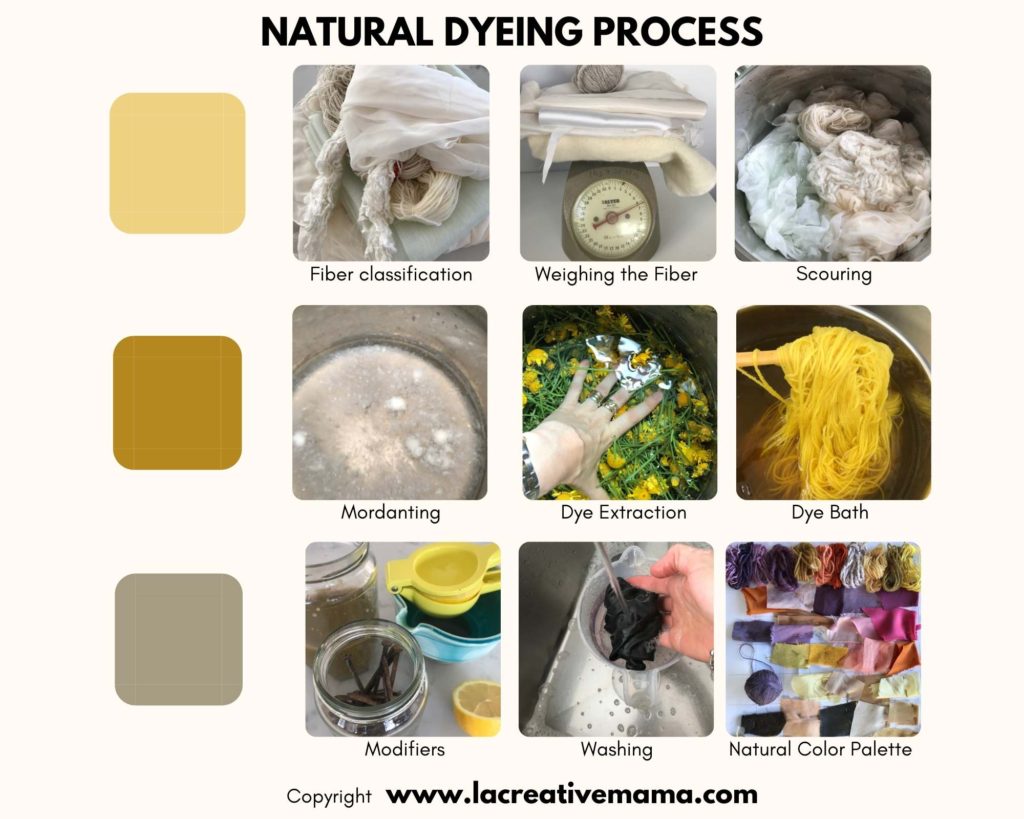
A High level Graphic of the different processes in Natural Dyeing
This post contains affiliate links, which means I receive a small commission, at no extra cost to you, if you make a purchase using this link. Please see my disclosure for more details
Get started right now with this easy to use Natural Dye Starter Kit. Click here
1- What is Natural dyeing?
Natural Dyeing is the process of using natural dyes that are extracted from natural sources, such as plants, minerals and insects. You can extract beautiful colors from leaves, flowers, bark, roots as well as rocks, fruits and veggies.
Every step of the process is very important and must be done in the right order.
Get your NATURAL DYES list
Complete the form below to download the FREE DYES LIST and learn which are the best dyes to use to create bright and long lasting colors.
2- How to get started with dyeing your fabric?
Steps in the dyeing process:
- Fiber classification.
- Weighing the fabric/yarn
- Scouring
- Mordanting
- Dye Extraction
- Dye Process
- Washing
Fiber classification
When working with textile crafts and in particular natural dyes it’s very important to know the difference between synthetic fibers and natural fibers.
All natural dyeing techniques will work beautifully for natural fibers but will not work for synthetic fibers.
It can take a long time to develop the skills to differentiate a silk from a silky polyester for example, or a wool yarn from an acrylic yarn. Fortunately you can quickly and easily do a fabric burn test, which is a great way to quickly know what kind of fiber you are dealing with.
Synthetic fibers are no good when dyeing with natural dyes so let me share with you the two types of natural fibers. These are protein based fibers and cellulose based fibers.
Protein fibers:
- Wool
- Silk
Among this category you can find:
- Sheep’s wool
- Mohair
- Alpaca
- Cashmere
- Camel
- Angora
- Tussah silk
- Cultivated silk
Cellulose fibers:
- Cotton
- Linen
- Bamboo
- Hemp
How to do a fabric burn test
Grab a piece of your chosen fabric. Get a lighter or matches. You can also use a pair of tweezers to hold the fabric, I like to use my hands.
Carefully light the match or lighter and hold it up against the edge of the fabric. How the fabric reacts will tell you what it’s made from.
If you are burning polyester fabric you will see the fabric melting when it hits the flame. There is no ash, rather it melts into a plastic edge which is hard and not easy to break. This is always a sign that the fiber is synthetic.
When doing the same with cotton and linen, the fabric will burn fast and when removing the match the fabric will continue to burn.
It will create ash and it will break away when touched. This is always a sign that the fiber is natural. 100% Wool will react in the same way.

Weighing the fabric/ yarn
Weighing the fabric or yarn is super important. In the current literature this process is referred as WOF (eight of fabric) or WOG (weight of goods).
My dyeing practice is based on experimentation and my objective is to create as many amazing colors as possible in order to use the fabric and yarns in my own creative sewing work.
This allows me to be creative and free in my process and I sometimes start mixing powders and plant materials as I go.
However, when I am teaching dyeing workshops I am very strict about weighing the fabric, the dye materials, the mordants, the assists and the modifiers in order to obtain beautiful and consistent results that can be repeated.
Word of warning: Natural dyeing is not an exact science and results will vary. Water from different locations will have different PH and that alone will make a difference. Sometimes using rain water is a good idea as a equalizer of results.
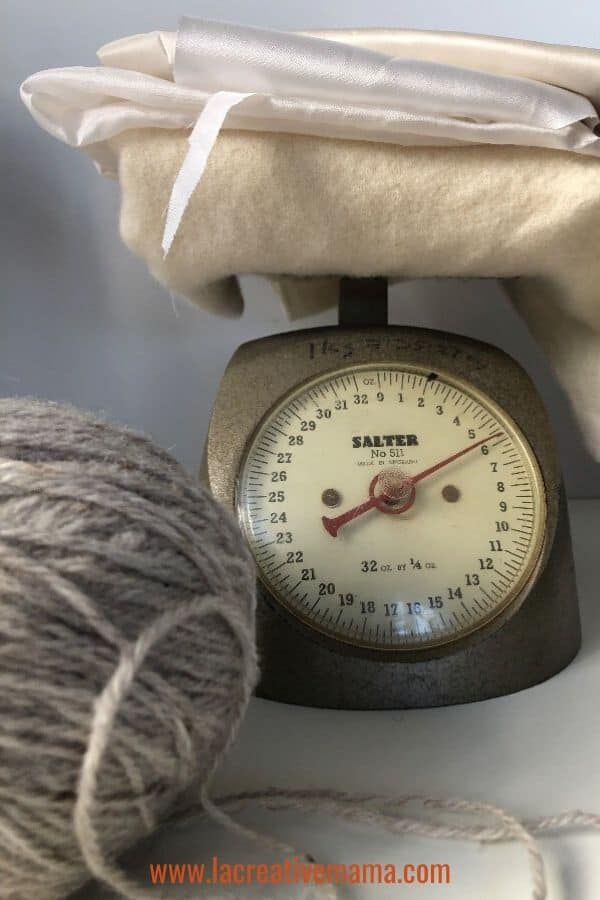
To determine what is the weight of your fabric or yarn simply place the exact amount of fabric or yarn on your scales.
Record this measurement. This will determine the amount of mordant and dye material that you will use in the following steps.
Scouring
It’s very important to ensure all fibers are clean from oils, dirt and industrial processes. Without the scouring process the dye pigment will be repelled from the fabric or yarn so it’s an important step in the dyeing process.
You also need a pot which is big enough to ensure that the fabric moves freely and that is well scoured.
I work with small amounts of fabric and yarn at any one time. I never work with more than 500 grs of fabric/yarn since my dyeing pots can’t handle more than that.
Therefore, I use the amount of 1 tablespoon of neutral PH soap as a blank rule for scouring to keep things easy for myself. Recipe below.
Equipment and tools:
- Soda Ash (also known as washing soda or sodium carbonate)
- Big stainless steel pot
- Measuring spoons
- Tongs and wooden spoons
- Rubber gloves
- Neutral PH soap
How to scour wool and silk which are protein based fibers
For wool squeeze the fibers gently immersing fully in hand hot soapy water. Use 1 tablespoon of neutral PH soap. Leave to soak for 15 mins.
Remove and rinse in hand hot water. You must be careful not to shock the wool fibers to avoid felting so always handle them gently and raise and lower the water temperature gradually.
Even if materials are ready for dyeing you still need to wash them. For silk you can follow the same method but you can use very hot water since silk is not as sensitive as wool. Even if materials are ready for dyeing you still need to wash them.
Make sure that you rinse well after the scoring process and that the water is running clear with no residue of soap.
Silk can withstand high temperatures so I also sometimes simmer the silk for thirty minutes just to make sure it’s totally receptive to the dyeing process.

How to scour cotton and linen which are cellulose based fibers
I cover the processes for cotton and linen in detail inside The Natural Dyeing Ultimate Course. There are several ways to treat cellulose fibers prior to naturally dyeing them but I have my own process which has been working wonders for me over the years.
Mordanting
Mordants are substances that are used to fix a dye to a fiber. They make the fiber open up in order to receive the dye when applied.
Mordants are used in solution and often we combine them with an assist (I normally use cream of tartar) which improves the fixing of the dye to the fiber. Without using a mordant most dyes would wash off after a few rinses.
Some dyes can be used without the use of mordants and these dyes are known as substantive dyes.
Mordants:
I only use Alum as a mordant since it’s the most eco friendlier of all the mordants. There are two types of Allum which are available from natural dye suppliers:
Equipment and tools:
- Glass jar
- Thermometer
- Measuring spoons
- Tongs and wooden spoons
- Rubber gloves and face mask
- Aluminium Potassium Sulphate (for wool and silk)
- Cream of tartar
- Big stainless steel pot
Mordant Process for protein fibers (wool and silk)
There are many recipes out there but my go to recipe is as follows:
10 % Alum (Aluminium Potassium Sulphate ) WOF (weight of fabric) and 8% cream of tartar WOF (weight of fabric).
So if I am dyeing 200 grs of fabric or yarn I will be using 20 grs of Alum and 16 grs of cream of tartar.
Dissolve Alum in lukewarm water in a glass jar. Make sure to use your gloves and mask for this step. Transfer to a larger stainless steel pot and make sure the Alum is well dissolved.
Add more water, then add the wetted fiber in the pot, making sure there is plenty of room. Slowly bring the pot to a temperature of 90 degrees C or 190 degrees F over a period of no less than 1 hour. Simmer for 40 minutes. Let the bath cool.

Mordant Process for cellulose fibers (cotton and linen)
My go to recipe for cotton and linen is very different to what we do for protein fibers.
I cover how to mordant cotton and linen in detail inside The Natural Dyeing Ultimate Course.
Dye Extraction
How to make fabric dye?
Now that you have gone through the fiber classification, the weighing of the goods, the scouring and the mordanting processes, it’s time to start extracting the dye from your plants, (fruits, flowers, leaves).
In other words, its time to let the magic happen This is the super fun part!!!!! This section will teach you how to extract the dye from the chosen dyestuff in order to prepare your dye bath.
Equipment and tools:
- Pots and pans (whatever you use it can never be used to cook food again!)
- Stirring wooden spoons
- Strainer
- Heat source
- Plastic jug
- Scale
- Rubber gloves and face mask
- Plastic bowl and bucket
- Fabric or yarn
- Natural Dyes
Dye Bath/ Extraction
Fill a big pot with water and your chosen flowers, leaves, bark or bugs. For this example I am using Dyer’s Chamomile flowers from my garden as well as wool yarn :).
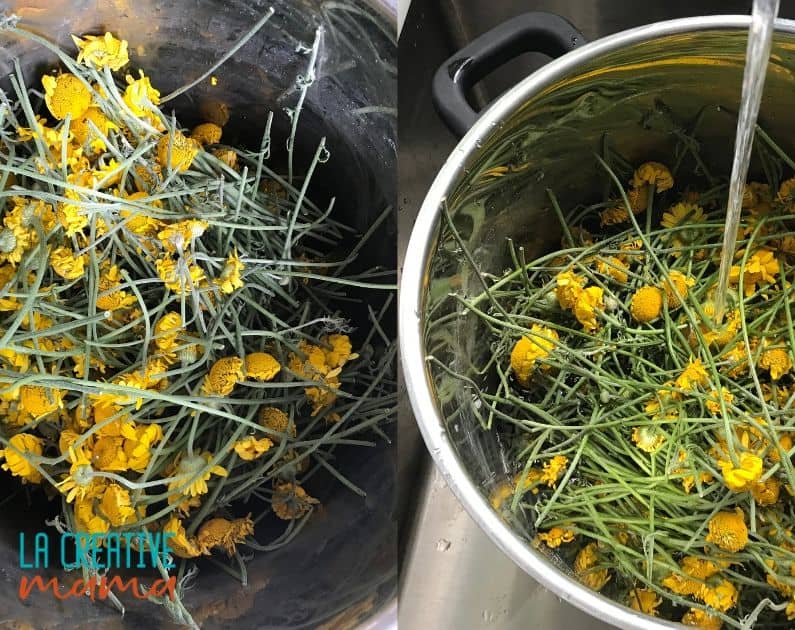
Bring to a simmer, 88 degrees C or 190 degrees F. Keep simmering for 1 hour. Turn heat off and let it cool naturally. You can leave cooling overnight.
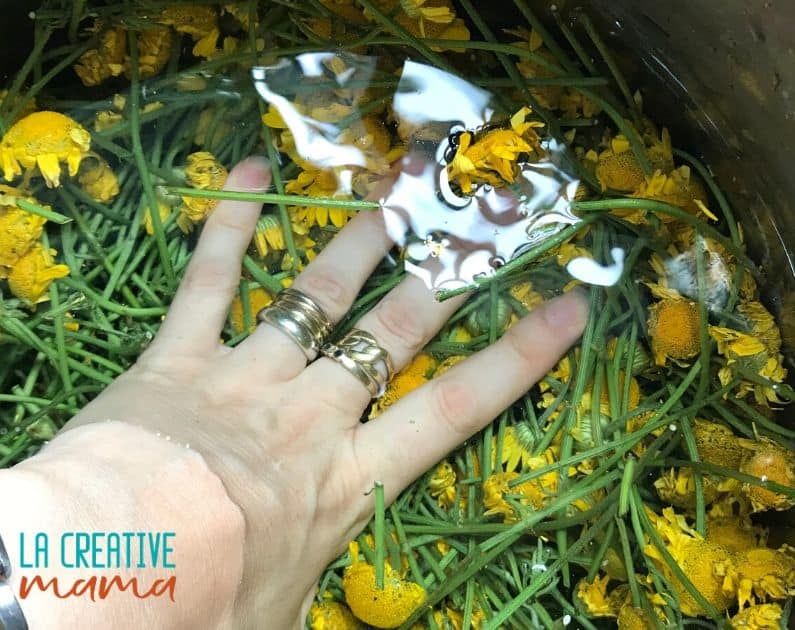
Strain and use as dye bath. Basic rule is 100% WOF (weight of fabric) but higher percentages may be used for deeper color results. If in doubt I use up to 300% WOF and if I feel the color is too dark I will dilute the dye bath with clear water.
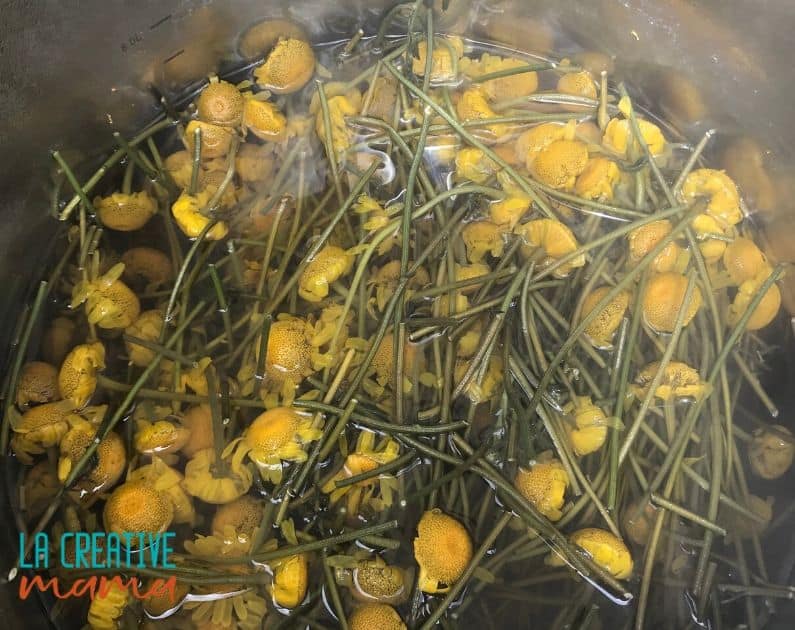
PRO TIP: It’s always better to soak your leaves, flowers, bark or bugs overnight before you start the simmering process. This will help start the dye extraction and will give you a better result!
Dyeing Process
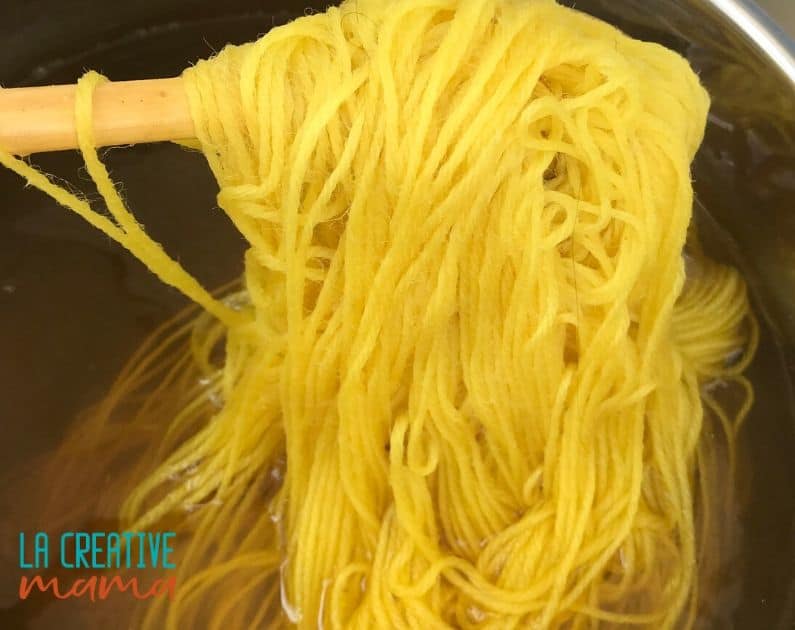
- Add the mordanted and pre wetted fiber to the dye bath
- Slowly raise temperature to a simmer, 88 degrees C or 190 degrees F.
- Simmer for 1 hour.
- Remove from the dye bath. Rinse fiber in lukewarm water. Make sure the water runs clear of dye
- Hang it to dry away from sunlight.
If you are dyeing wool you must be very careful of felting. Never allow the temperature to go higher than simmering point and when you turn off the heat make sure that you allow the dye bath to cool down naturally to room temperature before removing the wool.
In case you decide to remove the wool beforehand to avoid the color becoming any deeper make sure that you place the wool in a bucket with fresh clear water the same temperature than the dye bath water temperature.
Allow the dyed wool to cool naturally in the clear water bucket.
This process will avoid shocking the fiber and it will avoid felting.
PRO TIP: If you are dyeing wool yarn you must always make a wool skein beforehand. If you are dyeing fabric, either silk, cotton or linen make sure that you keep stirring the fabric constantly for the whole hour of dyeing. This will avoid marks and streaks in the fabric.
Also, make sure that the dyeing pot is big enough so that the fabric can move freely and the dye can be evenly absorbed.
Get started right now with this easy to use Natural Dye Starter Kit. Click here
Using modifiers to expand the color palette
You can keep having fun well after that first dye immersion process. Once you have dyed your fabric or yarn with a particular dye you can carry on modifying the color further with the use of modifiers.
You can extend the range of the color by obtaining different tones or even by changing the color completely.
I always use two modifiers:
- An acid modifier by using lemon juice
- An metallic salt modifier by using iron water
How to modify the color using lemon juice?
Allow the dye bath to cool down to room temperature. Add 2 teaspoons of lemon juice to the dye bath (the fiber is in the bath). Stir to make sure that the fiber is moving freely and that the modifier is reaching all areas of the fiber.
Leave for fifteen minutes. the color should turn to a mandarin orange tone. Remove from dye bath, rinse well and dry.
How to modify the color using iron water?
First of all you need to make the iron water. Iron water can be used as a pre mordant and a post mordant to act as a color modifier.
Bellow is the best way to make an iron water solution. Read here the full step by step tutorial iron water recipe. You need:
- Sealable jar
- White vinegar, 1 cup
- Water, 1 cup
- Rusty nails
Place the small rusty nail objects inside a sealable jar. Pour water and white vinegar to cover the objects. Cover the jar and leave for at least 3 weeks.
Strain the liquid so that there are no rusty bits in it. Now that you have your iron water, you are ready to modify the color. Allow the dye bath to cool to room temperature.
Remove the fiber and pour the iron water by mixing a 1:1 ratio of the iron water and clear water. Stir to make sure that the fiber is moving freely and that the modifier is reaching all areas of the fiber.
Leave for fifteen minutes. the color should turn to a darker and duller tone. Remove from dye bath, rinse well and dry.
In the illustration below you can see the transition of silk and wool yarn which were first dyed with onion skins (top section), then modified with lemon (middle section) and modified with iron (bottom section).
This subtle tone difference is created by the amount of exposure to the modifiers.

In the illustration below you can see the golden color obtained from acorns go through a more dramatic transformation by modifying with iron water to obtain a dark grey/black.

Washing
After the fabric or yarn has been dyed it needs to be washed to make sure that you are removing any excess dye.
Washing protein based fibers (wool and silk)
Protein based fibers are prone to felting, therefore I like washing my silks and wools by hand using mild liquid soap.
Avoid high temperatures at this stage and after rinsing sandwich the fabric or yarn in between two towels. Without any friction gently press to remove moisture and then hang to dry.
Washing cellulose based fibers (cotton and linen)
You can repeat the same process as with protein based fabrics in case you are dyeing yarn. But since cellulose based fibers are not prone to felting you also have the option of using the washing machine which makes it super easy :).
What Can You Use As Natural Dyes?
In my years of dyeing practice I have discovered what works and what doesn’t work. Here is a list of plants, flowers, bark, roots, insects, veggies and fruits which work beautifully.
I suggest you stick to this list which is broad enough and will give you the full spectrum of color.
As a mom I like to keep things super simple and very efficient so I have developed a list of dyes that give me the a big variety of colors, the pinks, reds, yellows and browns. In this Beginner’s Guide to Natural Dyes I have created a list of dyes that will work for you.

These dyes will dye your fabric beautifully and if you follow my method the color will stay in your fabric forever:
- Cochineal bugs for pinks
- Madder root for reds
- Logwood for purples (I normally buy these dyes from the supplier and keep them in stock in my workroom)
- Eucalyptus for golds and mustard yellows
- Onion skins for bright yellows
- Dyers Chamomile for bright yellows
- Avocado skins and stones for soft pinks
- Acorns for browns, golds, greys and blacks
All these dyes will produce different tones depending on the mordant you use and if you modify the color after the initial dye process.
Download your FREE Natural Dyes list
Complete the form below to download the FREE list of the best 40 dyes to use in natural dyeing! Save time and frustration!
Natural dyes recipes
There are many recipes using different dyestuffs. Here are some of my favorite step by step tutorials, all of them using food waste as dyestuffs.
- Natural dyeing with Onion skins (gold,yellows)
- Natural dyeing with Acorns (gold, black , grey)
- Natural dyeing with Avocados (Blush,pinks)
- Natural dyeing with tea (browns)
Mordants in Natural Dyeing
Mordants play an important role in natural dyeing. Read this article to find out the types of mordants and their applications.
There are some dyes that don’t require any mordants and they are well worth checking out!
Different methods of natural dyeing
There are other methods of dyeing your fabric. Here are some other methods that you can try:
- Hot Dyeing Method ( which is the method that I have covered in this post)
- Solar Dyeing Method
- Eco Printing on Paper
- Eco Printing on Fabric
- Bundle dyeing
- All in One Method
- Tie dye
What can you do after dyeing your own fabric and yarn?
Try making your own pom poms or a beautiful fabric flower. It’s super quick and easy and you can use it a a brooch or as a hair tie.
You can also make baby toys using scraps from naturally dyed fabric and yarn using differnt methods of natural dyeing.
Also you can make beautiful applique fabric collages using scraps of naturally dyed fabric and embroidery threads as well as left over fabric from other projects.
Check out this fabric flower tutorial using fabric scraps that were naturally dyed using the solar power method. Also decorated with dyed yarn using the hot dye method.
Common Questions/FAQ About Natural Dyeing
1- Do natural dyes fade?
The color will stay forever as long as you have gone through all the steps. The pre mordanted fabric has been prepared to receive the dye and once you remove the dyed fabric from the dye bath the fiber will close up and retain the color
2- Can I use beetroot, carrots, grapes to dye with?
I recommend that you stick to my list of dyes since you are guaranteed beautiful colors that will last. Natural dyeing is a long process so you are better off using dyes that you know will yield beautiful color.
I always tell my students to use dye material which is happy to give you its color. Having said that, once you feel comfortable with the technique and you have had great results you can start experimenting with other leaves and flowers around you
3- Can I skip the pre mordanting step?
No the only dye that doesn’t require pre mordanting is Indigo and it’s a whole different process.
4- Can I wash my dyed silk in the washing machine?
Yes! Silk is very easy to handle and it resists high temperatures. Be careful with very hot settings since very hot water can take the shine away from the fiber.
5- How can I permanently dye clothes at home?
By following the steps outlined in this article you can dye your own clothes at home. You can even dye an already made silk shirt or skirt.
The Last Thing You Need to Know about Natural dyeing
In summary you can permanently dye your own clothes, your own fabric and yarns at home safely using natural dyeing. As a mom I have always involved my kids in my creative practice and dyeing has been no exception.
Make the walks to the park an opportunity to pick up some leaves from the ground. Make the cooking time an opportunity to gather some onion skins or avocado skins and stones.
Natural dyeing is a great way to use all the silk and wool scraps you have lying around from previous projects. You can create beautiful crafts to sell by dyeing scraps of fabric.
It’s also a wonderful way to prepare your crafts materials for your embroidery projects, your textile collages, your quilting, patchwork, etc.
Community workshops
I teach a range of natural dyeing workshops within my local community. Last weekend I taught a group of creative, crafty and amazing women how to use this wonderful natural dyeing technique.
We used all dye material that surrounds us here in New Zealand and these were the results at the Selwyn Community Education.
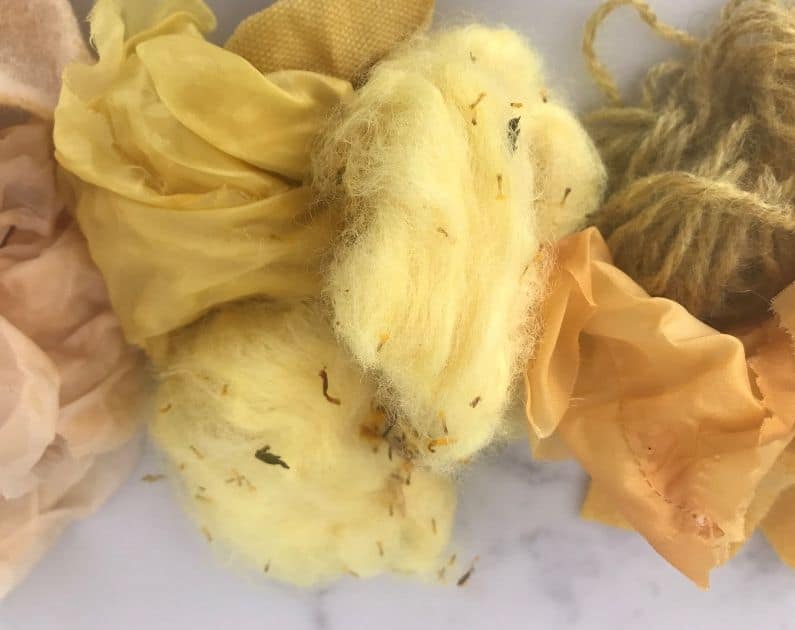
There are many books on this subject, but here are a few of my favorites.
Favorite Natural Dyeing Books:
- “The Wild Dyer, a Guide to Natural Dyes & the Art of Patchwork & Stitch ” by Abigail Booth
- “Wild Colour, How to Grow, Prepare and Use Natural Plant Dyes” by Jenny Dean
- “The Complete Guide To Natural Dyeing” by Eva Lambert and Tracey Kendall
- “Natural Dyeing With Plants, Glorious Colours from Roots, Leaves and Flowers” by Franzisca Ebner and Romana Hasenohrl
- “Botanical Inks” by Babs Behan
I hope you have enjoyed this guide to natural dyeing.
If you have any questions about Natural Dyeing please reach out and I will be happy to answer them Also if you like this post please share it with your other creative mama friends!


Thank you so much for this! I have been dying our home grown mohair and wool for years with acid dyes but am feeling more and more drawn to try natural dyes. There is so much half info out there and some really ugly results! Your instructions are clear and exciting – thank you so much for making them available 😆♥️ Best wishes to you and you family, Sue x
Hi Sue, thanks so much for your kind words and I am so happy to help you through the journey of discovering the exciting possibilities that come from using natural dyes! Reach out with any questions that you may have!
Amazing amount of detailed information. thank you.
You are most welcome Judith!
Wow, well written !
Cheers Eleonora 🙂
Hello Victoria, Thank you so much for taking the time to share what you have learned over the years in a smart and concise way. I am not sure if you have had this tutorial on hand or if you made if specifically for this blog / post. It took time and a lot of forethought to put together. Thank you also for the download which is priceless. Be well stay safe and most of all have fun 🙂
Hi Leslie, thanks so much for your lovely comment! Yes I wrote this article for my blog because I wanted to share with my readers the methods that I use to get great natural color 🙂 I love natural dyeing and great to see you do too 🙂
Hello Victoria, Thank you so much for taking the time to share what you have learned over the years in a smart and concise way. I am not sure if you have had this tutorial on hand or if you made if specifically for this blog / post. It took time and a lot of forethought to put together. Thank you also for the download which is priceless. Be well stay safe and most of all have fun 🙂 I would also like to add what I was taught about flame testing fabric. If the smoke is white it is natural fiber, if black smoke synthetic fibers.
Thanks Leslie and yes you are totally right!!!!!!! Cheers for sharing that!
Hi, I was wondering how this method would work to dye an old orange cotton knit that has faded. Do you have any tips on dyeing already coloured fabrics?
Hi Alice, YES! the process would work fine for a pre dyed cotton t shirt. Just make sure that you treat it as any other cotton fiber so you will need to scour it, mordant it with alum acetate following the cotton process and then you can dye it. hope this helps 🙂
Thanku soo much. 😍
cheers!
Hi Dipika, not sure how to remove them, I always try to make them so that they are permanent and stay forever lol
“For each 100 grs of dry fabric/yarn you will need 25grs of Alum Acetate. ”
So is your Alum Acetate 20% WOF? That is what is seems. Im very new to dyeing but just thought that is very high. I seen alot of articles mention 8-10% WOF.
Can you confirm that is what you use for Cellulose fibers.
Hi Ari, we use alum acetate for cottons and linens which are a bit more tricky than dyeing with silks and wools. so, there a re a a few recipes out there and my favorite is actually to use a warm mordant bath of tannin 10% weight of fabric followed by another warm bath of 10% alum acetate…however, if you are just starting you will get good results by doing a hot mordant bath at 25 % with alum acetate. If you are just starting I suggest you start with protein fibers which are easier to mordant and they absorb the color beautifully, hope this helps!
Thank you for sharing your knowledge! The overview you share so beautifully and clearly has helped me to have a solid framework to navigate all the different sources of information I’ve encountered in my experiences learning about natural dyeing. It’s wonderful. I am organizing a multi-week natural dyeing exploration within my local unschooling/homeschooling community this fall. Is it okay to print out copies of your Natural Dyeing Process, it’s under the heading “A High level Graphic of the different processes in Natural Dyeing” – ? I will not be making any money with these events. If it is okay, are there any other acknowledgments you’d like me to share with the group, beyond your website link that is already at the bottom? Thank you again and good wishes. Udazken on!
Hi Ezeder,
wow thats wonderful!!!!! I love your event!!!! I will appreciate you referencing my blog http://www.lacreativemama.com and also we are creating some resources for teachers and homeschool parents since we have had so many requests! So please stay tuned for those resources to come in the near future! All the best with the event!