Hi Creative Mamas! I want to share with you my love for using avocado dye in my natural dyeing practice.
I love avocado dyeing because it’s a great way to re purpose our food waste. Knowing that the food we eat can provide us with such great dye color is a wonderful thing.

Following the step by step tutorial on how to dye fabric and yarn using avocado dye here are a few more tips to get you fantastic results.
Here are my best tips to dye fabric and yarn using avocado dye. These are tips that I have picked up from dyeing many times with avocado dye and that I hope will be useful to you too.
Download your FREE Mini Natural dyeing Guide
12 tips for avocado dyeing
These tips are in no particular order.
1-Use a natural fiber
Make sure that you are aware of the type of fabric or yarn that you want to dye with avocado dye. When using natural dyes you must always use natural fibers such as cotton or linen (cellulose fibers) and silk or wool (protein fibers).
To classify the fibers you can perform a little fabric burn test which will tell you straight away if the fiber is natural or synthetic.
2-Follow the correct natural dyeing process
Natural dyeing can be very random or quite precise. It all depends on the recipe or instructions that you are following.
Unfortunately there are many dyers who don’t follow the correct process and they end up producing faint colors that just don’t work.
This is very frustrating because dyeing with natural dyes can take a long time and you want to make sure that your time pays off and that you produce bright and long lasting colors.
If you follow the correct process you will be able to achieve beautiful results from your natural dyeing, but you must not skip any of the steps. Check out The Ultimate guide to Natural dyeing for a step by step tutorial of all the processes involved in natural dyeing.
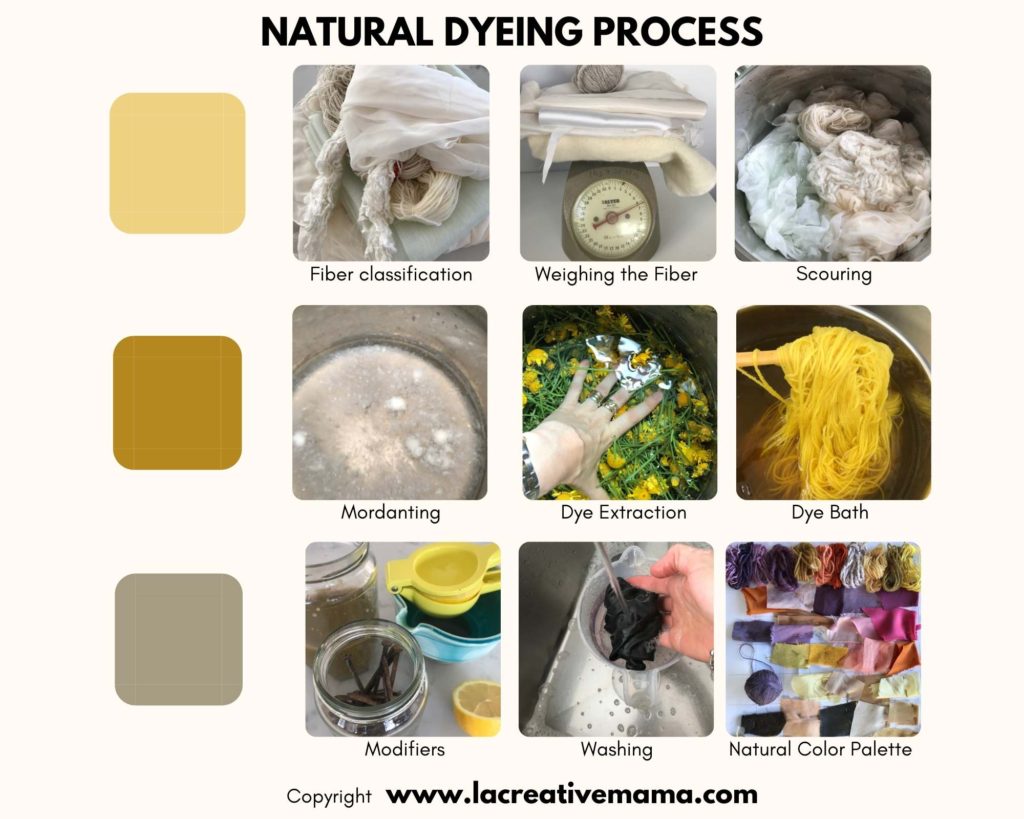
The illustration bellow shows the entire process require to obtain great results from natural dyes.

Natural dyeing steps:
- Fiber classification
- Scouring
- Mordanting
- Dye extraction
- Dye bath
- Washing
Mordants used with avocado dyes
You can use different types of mordants but my preferred mordant is Alum. It’s environmentally safe (however you must wear a mask when handling it just to be super safe) and it yields beautiful results consistently even with different water PH conditions.
Other mordants include:
- Copper
- Tin
- Iron
- Chrome
Note: I don’t use any of these in my practice except for iron from time to time. I prefer modifying the color by using natural iron water.
3- Use stainless a steel pot
Using a stainless steel dye pot will not affect the color results from your avocados. It’s a great pot to use for the dye bath with both avocado skins and avocado pits/stones.

4-Use avocado pits for pinks
Avocado pits can deliver many tones of pink. This will depend on the water PH, the type of avocado, the soil where the avocado tree is growing and also the temperature of the water during the dye extraction.
Keep water just under simmering temperature.

5-Use avocado skins for blush
Avocado skins make beautiful blush tones and when you combine avocado skins with avocado pits/stones you get a deeper more pink tone of blush.
I like mixing them together in my dye bath.
Make sure that the water doesn’t boil during the dye extraction process by keeping under simmering temperature.
The photo below shows the variety and depth that you can get from the humble avocado dye.

6-Steep overnight
Leave avocado skins and pits steeping overnight. This will allow the dye to start releasing slowly before you even go through the dye extraction process.
When you are ready to start the color extraction simply pour the avocados with the colored water onto a big stainless steel pot, add enough water to cover the avocados and start extracting the color.

7-Leave yarn to cool in dye bath
After you complete the dye process you can leave your yarn to cool overnight inside the dye pot. This only applies to yarn. If you are dyeing a length of fabric and you want to avoid streaky results you must remove immediately after the dyeing process is complete.
Don’t let your fabric sit in the avocado dye unless you are using avocado dye bath in Bundle dyeing. This is a great way to use avocado dye and you can expect really surprising results!

8- Test water PH levels
Try using water from different locations. You most probably will see big differences and this is due to the water PH. You can test the PH level in your water using these testing kit.
I recommend dyeing with rain water as much as possible but I am aware that its not very practical.
The colors will vary a lot depending on the quality of water you dye with.
9- Store avocado skins and pits
I like using fresh avocados when possible but in summer we end up with so many avocados that I always store them for future use. You can store avocados in 3 ways:
- Freeze them fresh
- Dry them and then freeze them
- Dry them and store in a paper bag
I do all three things depending on how many I have in bags and in the freezer.

10- Clean avocado skins and pits
Make sure to scrape all the avocado flesh from the skins and the pits. I use a metallic sponge which is super helpful in removing all residue. Once the skins and the pits are totally clean I will either dry them or freeze them.
11- Modify avocado dye with iron water
Once you have gone through the dyeing process and you have dyed your fabric or yarn you can choose to further modify the color. This is a great way to expand the color palette provided by the avocado dye.
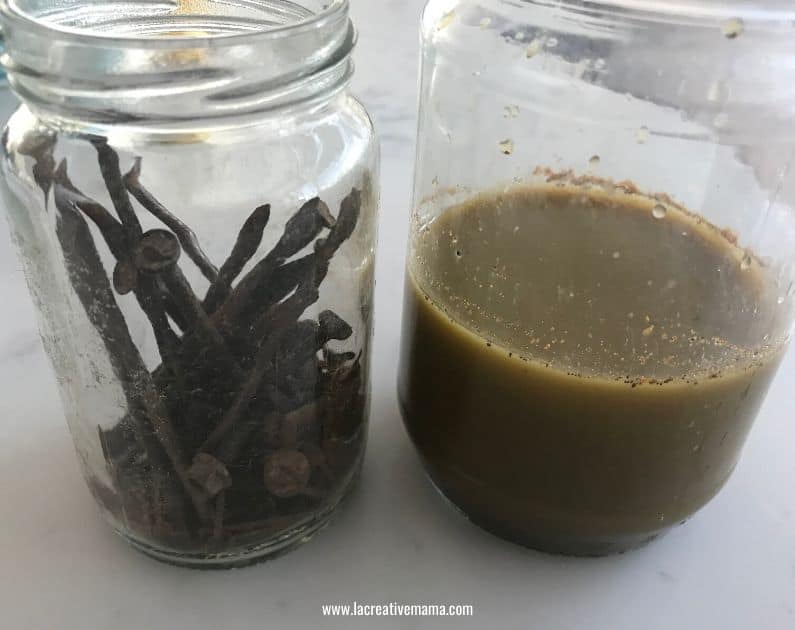
I like to make my own iron water and to use it as a color modifier. When combining iron water with the dyed avocado fiber you can get a darker color, some people call it a saddened color. I really like how this looks and it make me happy not sad 🙂
Check out how to make your own iron water and the color possibilities available to you.

12- Use avocado to eco print
If you have an avocado tree near you make sure that you get hold of the amazing avocado leaves. I actually use the avocado leaves as a dye in its own and it provides me with a deep yellow color.
However, the avocado leaves provide us with a beautiful print which is worth exploring through fabric printing and eco printing.

The photo below shows an envelope pillow made out of naturally dyed silk. The square in the muddle of the log cabin block is an avocado printed leaf.

I hope you have enjoyed this article. Reach out with any questions that you may have.

👍👍
Cheers!
I chop the pits while they are fresh and let them dry. You’ll get more color from them that way.
Thank you- lovely article thanks for sharing.
I just want to know the final step. You have put the fabric in the dye bath- you have a beautiful result, it’s dried completely.
Now I need to wash it properly. This is what I need the advice on….
Is there any place for using bicarb at this point? Or just a gentle neutral soap wash??
Hi Lianne,
Just a gentle soap wash would be enough. the main issue in this last step is to make sure your water is running clear (again, you already rinsed it thoroughly before) and to wash the fiber so that it has a nice handle and smell 🙂 Hope this helps 🙂